The COVID Pergola — the Project That Replaced My Other Project
I built an outdoor kitchen against the back of the house. Then I knocked it out, hauled it away in bags, and put a pergola there instead. Building sometimes means unbuilding first.
We earn a commission when you buy through our Amazon links, at no extra cost to you. It never changes the order of the picks, and we say so when the cheaper thing is the better buy. How this works.
This is the only project on this site that starts by destroying an earlier project on this site. It was at a house we used to live at, and it happened during COVID, which is when a great many people looked at their own backyard properly for the first time in years and decided it could be better.
Mine already had something in it. I had built an outdoor cooking area along the back wall — stone-faced base units with a solid countertop over them. It was fine. It was also in exactly the place the pergola needed to be, and I had come to want a covered, lit, usable outdoor room far more than I wanted a bar I was not using.
So I took it out. My brother-in-law Matt helped with the build that followed, and between us we replaced one finished thing with another.
No dimensions, no lumber list, no cost and no timeline on this page. This one was built years ago at a house we no longer live at, and I did not write any of that down at the time. What I have is the photographs and what I remember doing, so that is what you get — the sequence, the reasoning, and an honest account of tearing out something I had already built. The hardware below is the class of part a job like this needs, researched rather than copied off receipts I do not have.
Chapter one: the thing that was already there
The outdoor cooking area as it stood: stacked-stone facing on block base units, built against the back wall. This is the part of the story people find strange — I built this, and then I took it apart.
The main run with its countertop on. There was real work in this — the stone facing alone is a slow, fiddly job — and none of that made it any less in the way.
Both units, from further back. The gap between them is where the appliance sat.
Chapter two: taking out my own work
There is a particular feeling to demolishing something you built yourself, and it is not the sad one people expect. It is mostly relief. Once you have accepted that a thing is in the wrong place, every week it stays there is a week the better version does not exist.
Appliance out, unit coming apart. Block and stone go to rubble faster than you expect and make a great deal more of it than you expect.
Cleared, and the reason the next photographs are all about a truck. That is a lot of broken masonry, and none of it is going in a bin.
Chapter three: getting rid of it
This is the part of a demolition nobody plans for and everybody underestimates. The work of knocking something down is one afternoon. Getting the pieces off your property is a separate project with its own logistics and its own bill.
Bagged and boxed on the driveway. The stone facing came off in pieces small enough to lift; the block did not.
A collection bag full of what used to be an outdoor kitchen, and the truck that came for it. Filling one of these is the honest cost of changing your mind about a masonry project.
Up and over. The last piece of the old build leaving the property, which is the actual moment the pergola started.
Chapter four: the pergola
What went up is a post-and-beam pergola over the patio — posts down to the slab, beams across them, and a run of rafters over the top. That is a deliberately plain description because it is the honest one: I am telling you what is in the photographs and not inventing a cut list I do not have.
The thing I would say to anybody building one is that it is a far more forgiving structure than it looks. It carries very little load compared with a roof. What it has to be is square and plumb, because a pergola is essentially a grid held up in the air, and every error in the posts shows up multiplied across the rafters where everybody can see it.
Posts, beam, rafters. That is the whole vocabulary of the thing, and the rafters are what turn a frame into a ceiling.
Lights up. This is the point at which everybody who has been politely tolerating the project starts asking when it will be finished, because suddenly they can see it.
From underneath at night, which is the view that actually matters. Open rafters do very little for shade and a great deal for the feeling of being in a room that happens to be outside.
Furnished and in use. Everything under here happened because a stone bar came out first.
The resident quality inspector, doing a lap. This is the photograph that tells you the project was finished, because nothing is propped against anything.
What I would tell somebody thinking about it
Be willing to remove your own work. That is the actual lesson of this one. The outdoor kitchen was not a failure — it was a decent build in a spot that turned out to be needed for something better. Treating your past projects as permanent because you made them is how a yard ends up as a collection of things you have stopped using.
Budget the disposal, not just the build. Masonry demolition produces an amount of weight that is genuinely difficult to comprehend until it is sitting on your driveway. Work out how it is leaving before you start swinging.
Get help for the beams. Matt was there for the build and pergola beams are a two-person job — not because they are impossibly heavy, but because holding one level at height while you fix it is not something one pair of hands does well.
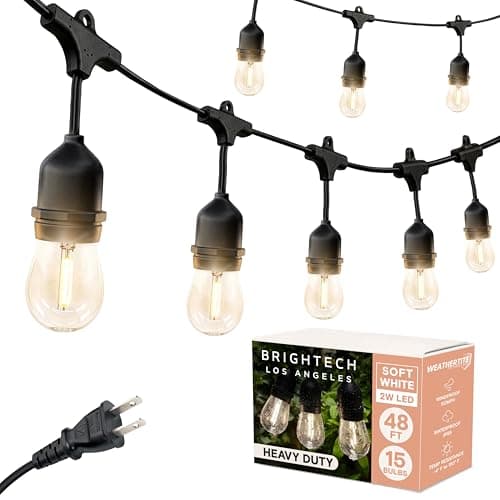
The lights are not an afterthought. An unlit pergola is a frame. A lit one is a room. It is the cheapest part of the whole project and the part that decides whether anybody actually sits out there.
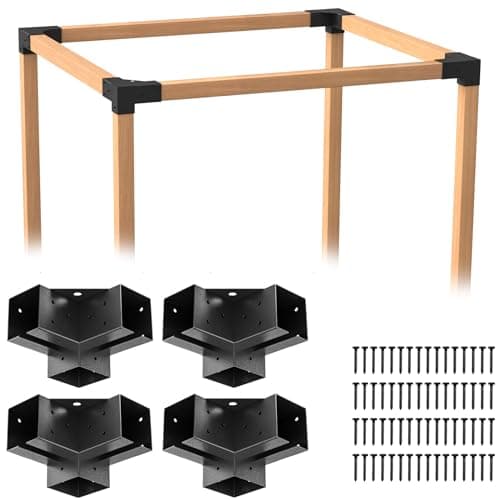
Brackets turn the hardest part of a pergola — a square, repeatable post-to-beam joint — into a bolt-together operation. For a first build they are worth more than the money they cost.
A pergola post is a lever with the weather on the end of it. The base is what keeps it standing and, just as importantly, what keeps the bottom of the post out of standing water.
Six inches of screw is what a beam-to-post or rafter-to-beam connection actually wants. Deck screws are for decking; these are for the parts holding the structure up.
Where a beam sits against a post and the joint is carrying weight, a through-bolt is the honest fastener. The domed head also looks like it belongs on a timber structure.
A penetrating oil stain that does not lap and cannot really be applied wrong. On a structure that is mostly edges and end grain, forgiving matters more than any other property.
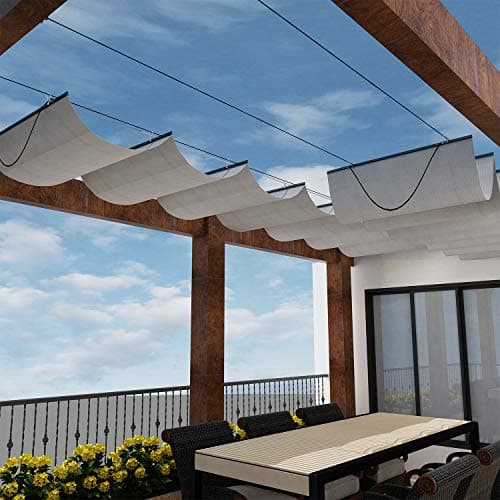
An open pergola is a light fixture and a sense of enclosure; it is not shade. If you want the space usable at two in the afternoon, the rafters need something on them.
#ad · Live prices from the Amazon Creators API, as of October 19, 2026. Where we have no verified live price we show none — a gap beats a number that has rotted.
In detail
The picks, in full
01
Best pergola brackets
Pergola Bracket Kit for 4x4 Beams (4-pack)
Fits nominal 4x4Powder-coated steelFour bracketsHardware included
8.0/10
Brackets turn the hardest part of a pergola — a square, repeatable post-to-beam joint — into a bolt-together operation. For a first build they are worth more than the money they cost.
Ease of build
10
Strength
8
Appearance
7
Value
7
What's good
+The post-to-beam connection is where a pergola is won or lost, and a bracket makes it repeatable across every post instead of dependent on four identical notches
+Far more forgiving than cutting joinery if you do not own a good saw and a lot of patience
+Reads as deliberate rather than improvised once the whole thing is up
What's not
−Nominal 4x4 lumber is not actually 4 inches, and bracket fit is the place that catches people — check the internal dimension against your actual timber
−Visible hardware is a look, and some people want hidden joinery instead
−Sold in fixed counts that rarely match the number of posts you have
Skip it if…
…you are notching the beams into the posts, which is the traditional method and is stronger if you do it well. Brackets are the answer when you would rather spend the afternoon building than practicing cuts.
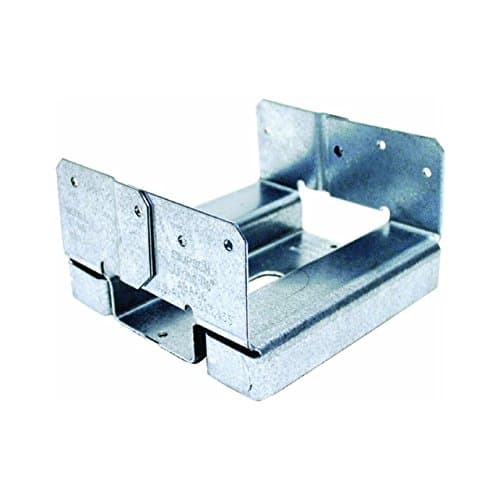
Simpson Strong-Tie ABA66Z Standoff Post Base, 6x6 (2-pack)
Fits 6x6 postsZMAX galvanized1in standoffAdjustable after the pour
8.5/10
A pergola post is a lever with the weather on the end of it. The base is what keeps it standing and, just as importantly, what keeps the bottom of the post out of standing water.
Longevity gained
10
Published data
10
Ease of install
6
Value
8
What's good
+The standoff is the whole point — a post sitting in a puddle rots from the end grain up and no finish fixes it
+Adjustable after the concrete sets, which forgives the layout error every first-timer makes
+ZMAX coating is rated for contact with modern treated lumber, which plain zinc is not
What's not
−More work than dropping the post in a hole and pouring around it
−Anchors have to be set accurately in wet concrete, which is a skill acquired during the job
−Raises the post height, which you have to allow for before you cut anything
Skip it if…
…the posts are going into the ground with concrete around them, which is a legitimate and very common approach. Choose deliberately rather than by default, and read the manufacturer's installation instructions either way.
Price as of October 19, 2026. Prices move — Amazon's is the one that counts.
#ad · we may earn a commission from this link to Simpson Strong-Tie ABA66Z Standoff Post Base, 6x6 (2-pack)
03
Best structural screws
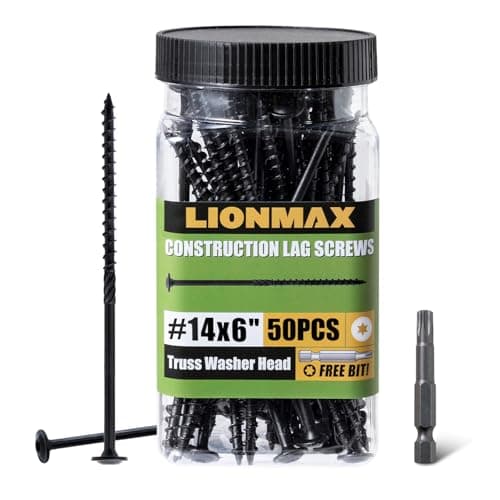
Structural Timber Screws, #14 x 6in (50-pack)
#14 x 6inExterior coatedWasher headStar drive
8.5/10
Six inches of screw is what a beam-to-post or rafter-to-beam connection actually wants. Deck screws are for decking; these are for the parts holding the structure up.
Holding power
9
Coating
8
Ease of use
8
Value
9
What's good
+Long enough to reach properly through a beam and into a post, which is where a shorter screw quietly fails
+Exterior coating rated for treated lumber
+Washer head seats without burying itself in soft pine
What's not
−Driving fifty six-inch screws is a job for an impact driver, not a drill
−Pre-drilling is still worth it near an end or an edge to stop the timber splitting
−Not a substitute for a through-bolt where a design calls for one
Skip it if…
…the connection is carrying real load in shear and the plan specifies a bolt. Screws and bolts are not interchangeable just because both are round and threaded.
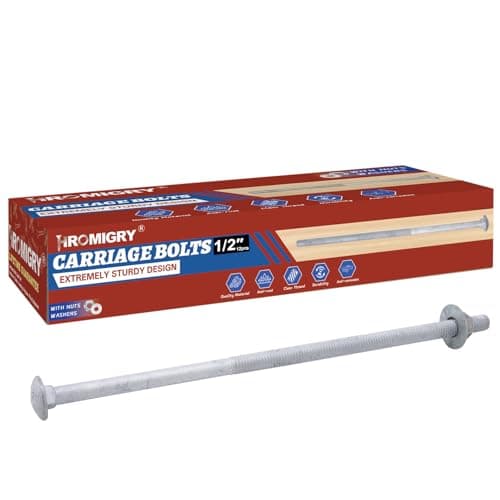
Hot-Dip Galvanized Carriage Bolts, 1/2in x 8in with Nuts and Washers
1/2in x 8inHot-dip galvanizedNuts and washers includedCarriage head
9.0/10
Where a beam sits against a post and the joint is carrying weight, a through-bolt is the honest fastener. The domed head also looks like it belongs on a timber structure.
Joint strength
10
Corrosion resistance
9
Completeness
9
Value
8
What's good
+A through-bolt clamps the joint rather than relying on thread engagement in one piece of wood
+Hot-dip galvanizing is the right coating for exterior structural hardware in contact with treated lumber
+Nuts and washers in the box, which sounds trivial until you are missing four of them on a Sunday
What's not
−Drilling a straight 1/2in hole through two pieces of timber is harder than it sounds — use a guide
−Over-torquing crushes the wood fibers and loosens the joint over time
−Eight inches is one specific length; measure your stack before ordering
Skip it if…
…you are using a bracket system that specifies its own hardware. Mixing fastener schemes on a structural joint is how you end up with neither one doing its job.
Price as of October 19, 2026. Prices move — Amazon's is the one that counts.
#ad · we may earn a commission from this link to Hot-Dip Galvanized Carriage Bolts, 1/2in x 8in with Nuts and Washers
05
Best finish
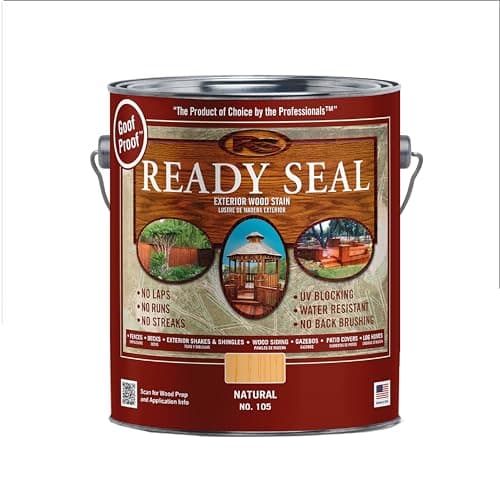
Ready Seal Exterior Wood Stain and Sealer (1 gallon)
Oil-based penetratingNo wet-line or back-brushingSelf-leveling1 gallon
8.5/10
A penetrating oil stain that does not lap and cannot really be applied wrong. On a structure that is mostly edges and end grain, forgiving matters more than any other property.
Ease of application
10
Durability
8
Coverage
8
Value
8
What's good
+No lap marks, no runs to chase, no application window to miss — which is the whole argument on a pergola with dozens of rafter ends
+Penetrates rather than filming, so it wears instead of peeling and the next coat is a wash and a recoat rather than a strip
+Goes on with a pad, a brush or a sprayer and all three work
What's not
−Takes days to reach its final color, which alarms everybody the first time
−Fresh pressure-treated lumber must dry out before it will take anything — this is the step people skip
−Not a film, so it will not give the glossy look some people are after
Skip it if…
…the lumber is newly treated and still wet. Nothing will hold and you will be stripping it. Check the manufacturer's dry-time guidance before you buy any finish at all.
4ft x 12ft panelRetractable on a wireUV-resistant fabricSlides open
8.0/10
An open pergola is a light fixture and a sense of enclosure; it is not shade. If you want the space usable at two in the afternoon, the rafters need something on them.
Shade gained
8
Flexibility
10
Durability
6
Value
8
What's good
+Retractable means you get shade in July and light in January, which a fixed cover cannot do
+Sold in strips you combine to the width you actually have, rather than one fixed size
+Far cheaper and far less permanent than roofing the structure
What's not
−Needs a wire system tensioned across the rafters, which is a project in itself
−Fabric shade covers are a consumable measured in years, not decades
−Wind is the enemy — anything spanning a pergola has to be retractable or very well anchored
Skip it if…
…the pergola is already under a roof overhang or heavy tree cover. Adding a canopy there buys you nothing and gives the wind something to pull on.
Brackets or joinery — decide before you buy lumber
Bracket kits make the post-to-beam joint repeatable and forgiving, which is the right call for a first build. Notched joinery is stronger and looks better if you cut it well. Both are fine; mixing the two schemes on the same joint is not.
Match the hardware coating to the lumber
Modern pressure-treatment chemistry attacks plain zinc. Hot-dip galvanized or a heavier rated coating on anything touching treated timber, every time. This is the mistake that shows up as rust streaks down your posts in year three.
Let the lumber dry before you finish it
Fresh treated timber will not take a stain. Check the finish manufacturer's dry-time guidance and be patient — this is the single most common reason a good build looks bad after one season.
Plan the light run before you hang anything
Work out the pattern and where the power comes from on paper first. Rehanging a forty-eight-foot run because the spacing looked wrong is an evening you do not get back.
Shade is a separate purchase
Open rafters give almost no shade. If you want the space usable in the middle of a summer afternoon, budget for a canopy or a sail as part of the project rather than discovering it in July.
How these were picked
I haven't handled these. Here's what I did instead.
Everyone in this category says they tested twenty of these. I haven't tested any, and I say so. What I do instead: read the manufacturer's manual and published specification, compile the numbers that decide the purchase, do the arithmetic in the open, check the live price, and name one product to skip. The scores above are judgments from that research against a published rubric — they are not measurements I took, because I do not have a lab and I am not going to pretend otherwise.
Questions
Frequently asked
Why tear out the outdoor kitchen?+
Because it was in the exact spot the pergola needed, and I had come to want a covered, lit outdoor room far more than a bar I was not using. It was a decent build in the wrong place. Being willing to remove your own work is most of what this page is about.
What are the pergola's dimensions and what did it cost?+
Not published. This was built years ago at a house we no longer live at and I did not write any of it down — no cut list, no lumber schedule, no cost. I am not going to reconstruct those numbers from photographs and present them as fact.
Does a pergola actually give shade?+
Open rafters give very little. What they give is definition and a place to hang lights, which is genuinely most of why people build them. If you want real shade in the middle of the afternoon you need a canopy, a sail or a solid cover over the rafters.
Is a pergola a hard build?+
It is more forgiving than it looks structurally, because it carries very little load. The difficulty is accuracy rather than strength — a pergola is a grid held in the air, and any error in the posts is multiplied across every rafter where everyone can see it. Get the posts square and plumb and the rest follows.
How do you get rid of masonry demolition waste?+
A collection bag and a grapple truck, in our case. The important part is planning it before you start: knocking a stone structure down is one afternoon, and moving the weight off your property is a separate project with its own cost.
We do not run a testing lab and we do not pretend to. Where a measured number came from a manufacturer's published specification or someone else's lab, we name them and link them. Where we could not verify something, we say so on the page rather than quietly leaving it out. Read the full method.