Five-inch rounds into a three-inch gap, mounted off the holes the removed radiator supports left behind. Once the grille is back on you cannot tell anything is missing.
We earn a commission when you buy through our Amazon links, at no extra cost to you. It never changes the order of the picks, and we say so when the cheaper thing is the better buy. How this works.
I had seen this done a few times on WJs and never on a ZJ in a way I liked, so I worked out my own. The whole problem is space and mounting: there is very little room behind that grille and nothing obvious to bolt to.
I found a method that works and did it fairly cheaply. I did have to cut some plastic out from behind the grille — and once the grille is back on, you cannot tell it is missing.
Originally documented on JeepForum. I wrote this up as a thread while I was doing the job, because the guides I found before starting were missing the pictures or the details I actually wanted. This is that write-up, reorganized and expanded for this site, in my own words.
The finished thing. Two rounds sitting behind the middle slots, which is the whole idea — no bar across the bumper, nothing bolted to the outside.
The lights, and the measurement that decides everything
I picked up a cheap pair from Autozone for $40. They are 5 inch round lights, just under 3 inches thick.
That thickness matters more than anything else here. When I measured the distance between the small radiator and the grille I got a little over 3 inches towards the bottom and a little under 3 inches towards the top. So these fit in barely. Measure your own gap before you buy anything, because that number is the entire constraint on this project.
The space you are working with. It does not look like much because it is not much.
The mount: a piece of bar and the holes that were already there
The next thing I bought was the piece I was going to mount the lights on — the best one I could find on short notice. I found it at Home Depot: $18 for all 10 feet, and I cut off a 16 or 17 inch piece for the project. Any other piece that meets the requirements would work just as well.
Then the part I am actually pleased with. There is a small piece that comes out right in the middle behind the grille, and two metal upside-down U-shaped supports attach to it. Mine were not connected to the radiator at the top anyway, so I removed them completely and used their screw holes as my mounting point. Those holes are threaded for M6 x 1.0. I had to file the backside of my bar so it would slide into place.
The two U-shaped supports and the center piece they bolt to. Those bolt holes are the mounting point the whole build hangs off.
Eighteen dollars for ten feet, sixteen or seventeen inches of it used. The rest is still in the garage, as these things are.
Once it slid into place I marked the bar where the mounting holes needed to go and drilled them with a bit as close to M6 x 1.0 as I could find. Then I painted the piece black so it would blend in with everything around it.
Painted. Behind a black grille, a black bracket disappears completely.
The part that is not for the faint of heart
I am sure some ZJ owners would be very against cutting these pieces. I did not see them being crucial to anything and there was no visible change once the grille was back on, so I made the call.
I cut the two plastic parts of the backdrop of the grille so the bar could sit where it needed to, and cut the one on the right as well to give a little more flexibility and let that light fit in there.
If that makes you uncomfortable, it should — it is irreversible and it is your Jeep. I am reporting what I did and why, not telling you to do it.
The cut. Small, permanent, and completely invisible with the grille on.
I used M6 x 1.0 x 20mm bolts through the bracket to hold everything in place.
Seating the lights, and one trick worth stealing
The only genuinely difficult part was doing up the bottom nut that holds each light onto the bar. I ended up using a few socket extenders to get through the bumper area and reach it.
The trick: I superglued the washers to the nuts so I could drop the whole assembly into the socket and not fumble with it while it threaded onto the bolt. That saved a genuinely frustrating amount of time.
Looking back, it might have been easier to take the brackets off the light housings, bolt the brackets on, mount the bar, and then attach the lights afterwards. That is what I would try next time.
Washers superglued to nuts. It sounds like nothing and it is the difference between a ten-minute job and an hour lying under a bumper.
The reach problem, solved with extensions. There is no straight line to that nut.
Mounted up and sitting where they need to be, before the grille goes back on.
One note that will catch you out: the ambient air sensor was on one of the center columns, so I had to relocate it further to the right.
Wiring
Pretty straightforward, with various routes depending on how good you want the switch to look.
The switch
I mounted mine next to all the other light switches. Take the trim out and the panel has a nice empty area on the right with nothing behind it — easy to modify. I used a drill held against each of the edges to slowly work the hole large enough for the switch I chose.
The blank spot on the right, with nothing behind it. This is what makes the switch look like it came that way.
Trim out, wiring exposed. Everything behind a ZJ dash is more accessible than you expect.
Done. The new switch in the blank position, next to everything else.
Through the firewall
Potentially you can pull the rubber grommet for the existing wiring in that area, but I think that would be far more tedious than it is worth. I drilled a hole through the firewall next to the master cylinder — with the intention of finding a rubber piece to seal it, or potentially hot glue.
Do put a grommet in it. A drilled steel edge against a wire is a slow-motion short circuit, and a grommet kit is six dollars. That is the one thing on this page I would do more properly if I were doing it again.
The master cylinder area, which is where the wiring comes through. Not elegant; entirely functional.
Routing
I had to extend the original harness that came with the lights so it would reach through the engine bay and stay out of everything's way. I ran it along the front quarter panel and zip-tied it in place, fed it into the grille area through a hole near the headlight, ran it across the front of the car and hooked it all up.
The diagram I drew for the original thread. Switch, feed, ground, two lights — and a note to ground it to metal in the dash near the switch. Check your own lights' packaging for which prong is which.
What it cost, and what it looks like
Around $60 overall. Forty for the lights, eighteen for ten feet of bar of which I used about a foot and a half, and bits and pieces.
Every dollar figure on this page is what I paid at the time, which was years ago now. They are here because the ratios are still useful, not because they are current prices. The only live numbers on this site are on the buy buttons.
Switched on in the garage. The light comes through the slots rather than around them, which is the effect I was after.
At night, everything on. Worth the sixty dollars and the Saturday.
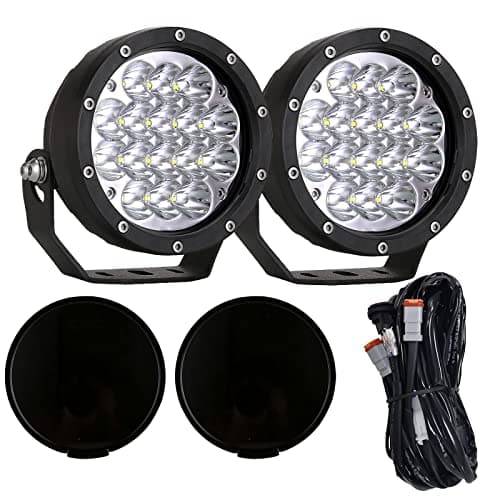
The modern version of what I fitted. Five-inch rounds are the size that fits behind a ZJ grille, and depth is the specification that decides whether they fit at all.
The switch is the only part of this job anybody else sees. Pick one you like the look of, because it is going in your dash for as long as you own the vehicle.
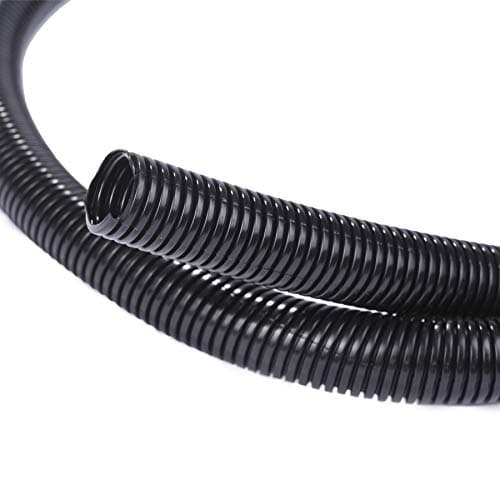
Every run that crosses an engine bay should be in loom. It is what stops a wire chafing through against a bracket two years after you forget the wire is there.
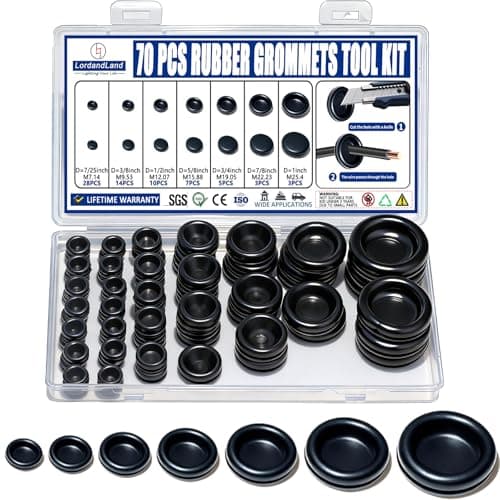
If you drill a hole through a firewall, a grommet goes in it. This is the six dollars that stops a sharp steel edge slowly cutting through your new wiring.
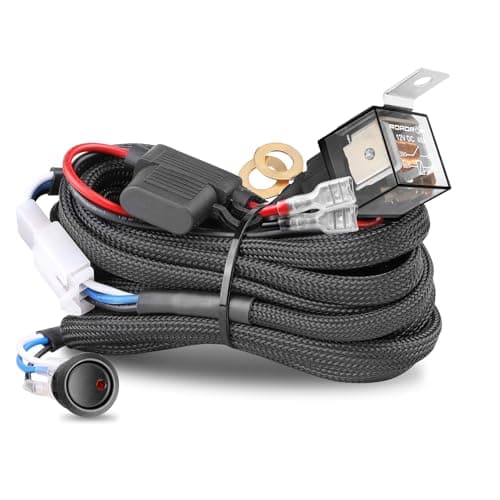
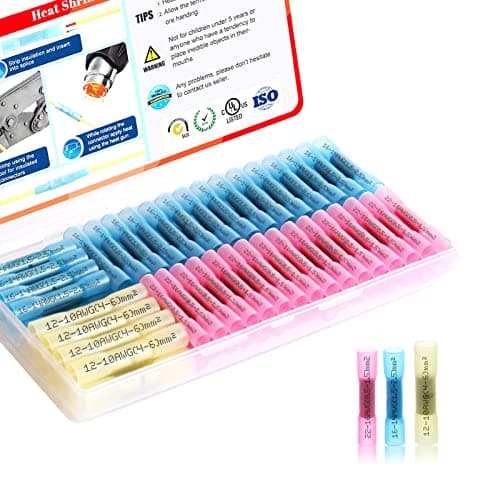
I had to extend the harness that came with the lights to get it where I wanted it. Adhesive-lined heat-shrink connectors are the right way to do that in an engine bay.
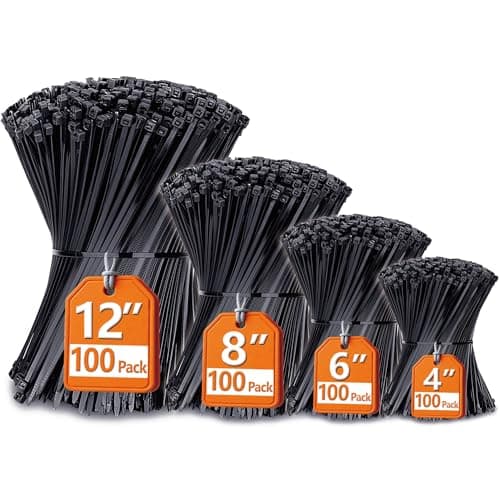
I ran the harness along the front quarter panel and zip-tied it in place. Buy the UV-resistant black ones — the white indoor ones go brittle and let go in a season.
#ad · Live prices from the Amazon Creators API, as of October 19, 2026. Where we have no verified live price we show none — a gap beats a number that has rotted.
In detail
The picks, in full
01
Best round lights
5in Round LED Driving Lights (pair)
5in round housingSold as a pairLEDBracket mount
7.5/10
The modern version of what I fitted. Five-inch rounds are the size that fits behind a ZJ grille, and depth is the specification that decides whether they fit at all.
Fit for the job
8
Output
8
Build quality
6
Value
8
What's good
+Five inches across is the size that lines up with the grille slots without looking bolted on
+LED draws a fraction of what the halogens I used drew, which matters if you are tapping an old harness
+Bracket-mounted, so the single-stud mounting method on this page still applies
What's not
−MEASURE YOUR DEPTH FIRST. I had a little over three inches at the bottom and a little under three at the top between the radiator and the grille, and my lights were just under three inches thick. They fit barely
−Cheap LED rounds vary enormously in beam quality between listings
−Mine were $40 halogens from Autozone in 2011 — this is the equivalent, not the same part
Skip it if…
…you have not measured the gap between your radiator and your grille. That measurement decides this purchase and nothing else does.
Relay, fuse, switch and enough wire in one box. Buying this instead of assembling it yourself is the difference between an evening and a weekend.
Completeness
9
Safety
9
Wire quality
6
Value
10
What's good
+The relay is the part people skip, and it is what keeps the switch from carrying the lights' full current
+Fused at the battery, which is the non-negotiable part of any accessory circuit
+Comes long enough to route the way I did — along the quarter panel and through into the grille area
What's not
−The included switch is generic; most people replace it with something that suits their dash
−Wire gauge is adequate rather than generous
−You will still be extending the light's own pigtail to reach, as I had to
Skip it if…
…you are wiring several circuits. Build a proper fused distribution instead — there is a whole page on this site about doing 12V accessory wiring correctly.
Price as of October 19, 2026. Prices move — Amazon's is the one that counts.
#ad · we may earn a commission from this link to 12V 40A Relay Wiring Harness with Switch and Fuse
03
Best switch
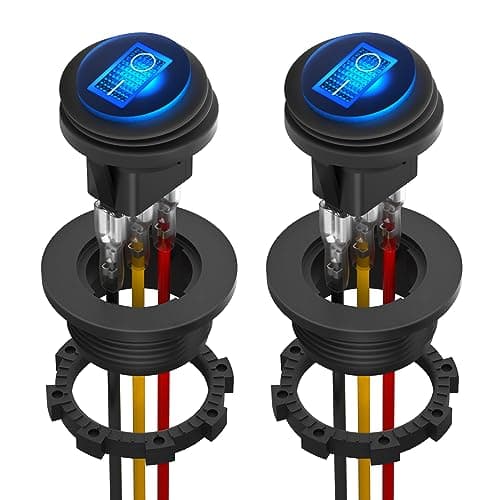
Waterproof Lighted Rocker Switch, 12V (2-pack)
12V SPSTIlluminatedWaterproof bodyRound bezel
7.8/10
The switch is the only part of this job anybody else sees. Pick one you like the look of, because it is going in your dash for as long as you own the vehicle.
Appearance
8
Ease of install
8
Durability
6
Value
9
What's good
+Illuminated, so you know the lights are on when you are parked and the beams are not obvious
+Round bezel drills out cleanly with a step bit or, as I did it, a drill worked slowly around the edges
+Waterproof body is worth having even inside a dash
What's not
−You have to make the hole, and a blank panel spot is the difference between a five-minute job and a bad one
−The illumination color is not to everyone's taste
−Cheap switch bodies have a limited number of cycles in them
Skip it if…
…your dash has a factory blank that takes a specific switch shape. Match the shape to the hole rather than the other way round.
1/2in diameter25ft rollSplit for retrofitHeat resistant
8.8/10
Every run that crosses an engine bay should be in loom. It is what stops a wire chafing through against a bracket two years after you forget the wire is there.
Protection
9
Ease of use
8
Length
9
Value
9
What's good
+Split construction means you can loom an already-installed harness without unplugging anything
+Twenty-five feet is more than enough for a front-of-vehicle run with spare for the next job
+Turns a visible hack into something that looks factory
What's not
−Split loom fills with grit over time in an engine bay
−Awkward to work with in the cold
−Adds bulk, so tight routing gets tighter
Skip it if…
…the run is entirely inside the cabin. Loom is for abrasion and heat, and a dash run needs neither.
If you drill a hole through a firewall, a grommet goes in it. This is the six dollars that stops a sharp steel edge slowly cutting through your new wiring.
Usefulness
10
Size coverage
7
Durability
6
Value
10
What's good
+Covers the sizes a drilled firewall hole actually ends up being
+Seals the hole against water and noise as well as protecting the wire
+Six dollars against a short circuit behind the dash
What's not
−Assortment kits always give you the wrong size in the greatest quantity
−Cheap rubber hardens over years of engine bay heat
−Fitting one around an already-run wire means splitting it, which halves its usefulness
Skip it if…
…you are using an existing firewall pass-through. Reusing the factory grommet is better than making a new hole, and it is what I would do differently.
Adhesive-lined heat shrinkMultiple gaugesCrimp then shrinkWaterproof seal
8.3/10
I had to extend the harness that came with the lights to get it where I wanted it. Adhesive-lined heat-shrink connectors are the right way to do that in an engine bay.
Seal quality
9
Gauge coverage
8
Ease of use
7
Value
9
What's good
+The adhesive liner seals the joint, which is what makes an extension survive a wet engine bay
+Color-coded by gauge so you are not guessing at the crimp
+Far better than the vinyl connectors most kits ship with
What's not
−Needs a heat gun; a lighter works and looks like it was done with a lighter
−A bad crimp under a sealed sleeve is invisible until it fails
−More expensive per joint than plain connectors
Skip it if…
…every joint is inside the cabin. Ordinary connectors are fine there and cost a fraction.
I ran the harness along the front quarter panel and zip-tied it in place. Buy the UV-resistant black ones — the white indoor ones go brittle and let go in a season.
Usefulness
10
UV durability
8
Assortment
9
Value
10
What's good
+UV-rated ties survive an engine bay and a wheel arch; standard nylon ones do not
+Assorted lengths mean you always have the right one
+Six dollars for more than you will use on this or the next three jobs
What's not
−Over-tightening a tie on a harness is a slow way to damage a wire
−Cut ends are sharp enough to draw blood when you reach past them later
−Not a substitute for proper clips where the factory used clips
Depth is the constraint, not diameter. Mine had a little over three inches at the bottom and a little under three at the top, and lights just under three inches thick fit barely. Measure yours.
Buy a harness with the relay in it
A relay keeps the light current out of your switch and off your dash wiring, and a fused harness with a relay, a switch and the wire costs about fifteen dollars pre-made. There is no reason to build one.
Put a grommet in the firewall hole
If you drill the firewall, grommet it. I did not do this properly at the time and it is the one thing on this build I would change.
Loom and tie everything in the engine bay
Split loom and UV-rated zip ties turn a visible add-on into something that looks like it belongs. Both cost almost nothing and both are what stops a wire chafing through in two years.
How these were picked
I haven't handled these. Here's what I did instead.
Everyone in this category says they tested twenty of these. I haven't tested any, and I say so. What I do instead: read the manufacturer's manual and published specification, compile the numbers that decide the purchase, do the arithmetic in the open, check the live price, and name one product to skip. The scores above are judgments from that research against a published rubric — they are not measurements I took, because I do not have a lab and I am not going to pretend otherwise.
Questions
Frequently asked
How much space is there behind a ZJ grille?+
On mine, a little over 3 inches towards the bottom and a little under 3 inches towards the top, between the small radiator and the grille. Lights just under 3 inches thick fit barely. Measure your own before buying anything.
What do you mount the lights to?+
A piece of bar bolted to the threaded holes left behind when you remove the two metal upside-down U-shaped supports in the middle behind the grille. Those holes are M6 x 1.0. I used M6 x 1.0 x 20mm bolts through the bracket.
Do you have to cut the grille?+
I cut two of the plastic pieces of the backdrop behind the grille, and one more on the right for clearance. It is not reversible and some ZJ owners would not do it. There is no visible change once the grille is back on, but that is my judgment about my Jeep, not a recommendation about yours.
What did it cost?+
About $60 all in at the time — $40 for the pair of 5-inch round lights and $18 for ten feet of bar, of which I used sixteen or seventeen inches. Those are historical prices.
Where do the wires go through the firewall?+
I drilled a hole next to the master cylinder. You could instead pull the existing rubber grommet for the factory wiring, though I judged that more tedious than it was worth. Either way, put a grommet in the hole — that is the part I would do better.
We do not run a testing lab and we do not pretend to. Where a measured number came from a manufacturer's published specification or someone else's lab, we name them and link them. Where we could not verify something, we say so on the page rather than quietly leaving it out. Read the full method.