A fifth-generation 4Runner Trail Premium, and the four jobs I have actually done to it: the drawers in the back, the bumper and winch on the front, the lights, and the wiring nobody sees.
We earn a commission when you buy through our Amazon links, at no extra cost to you. It never changes the order of the picks, and we say so when the cheaper thing is the better buy. How this works.
The truck is a 2014 Toyota 4Runner Trail Premium — a fifth-generation 4Runner, and specifically the off-road trim rather than the comfortable one. It has been the platform for four separate projects, and this page is those four projects with the photographs I took while doing them.
A note before any of it, because it decides how you should read this page. Where I name a part, it is because I went back through the orders and the photographs and confirmed it. Where I do not, I am not guessing. Two things on this truck are still unnamed: the front bumper and the rear cargo panel, both bought used on eBay and neither of them carrying a brand I can point to. Those two are described, priced with what I actually paid, and matched to the closest thing you can buy today in shop the build — clearly labeled as equivalents, because they are not my parts and I am not going to pretend otherwise.
This page started life as four projects. It is now six: the drawers, the bumper and winch, the lights, the wiring, the radios, and the kit that lives in the back. The four original ones are still first, because they are still the ones that took the most work.
Why the Trail trim, honestly
The fifth-generation 4Runner came in trims that look similar and are not. The Trail — later renamed TRD Off-Road — is the one with the off-road hardware, and three specific things put it there:
KDSS. Toyota's Kinetic Dynamic Suspension System, which hydraulically decouples the anti-roll bars when the suspension articulates. In plain terms it lets the truck keep its wheels on uneven ground without being a boat on the road — normally you pick one of those two, and KDSS is the mechanism that lets you have both.
A locking rear differential. An open differential sends power to whichever wheel has the least grip, which is exactly backwards when one wheel is in the air. A locker forces both rear wheels to turn together. It is the single most useful traction feature on a vehicle like this.
Crawl Control. Low-speed throttle and brake modulation handled by the truck so you can concentrate on steering.
That combination is why this trim and not another one, and it is worth understanding before you shop a used 4Runner — the trims are close enough in appearance and far enough apart in capability that people buy the wrong one. Toyota's own site is the place to confirm what any given model year and trim actually carries, and a VIN check is worth doing on a used one rather than trusting a badge.
Project one: the rear storage system
This is the one I am most pleased with, because it is entirely built rather than bought.
The platform in bare plywood, before it went in the truck. Two bays, a flat deck, and the whole thing built to the shape of the cargo area rather than to a rectangle.
Test fit. This is the step that decides whether the whole thing works — a cargo area is not square, the wheel arches intrude, and the floor is not flat.
One of the side pieces in place. Fitting to the trim rather than around it is what makes the finished system look like it belongs there.
The design brief was simple and it is the right one for a vehicle drawer system: a flat load floor at the top, with everything underneath reachable without unloading what is on top. That is the entire argument for drawers over bins. With bins, the thing you need is always under the thing you do not.
Finished and installed. Two drawers with flush latches, a carpeted deck on top, and a usable flat surface where there used to be a sloping cargo floor.
The full width. The deck runs the whole cargo area, which is what makes it useful as a surface as well as a lid.
Both drawers out, which is the honest picture of what a system like this is for: a long case down one side, and recovery and vehicle gear down the other — gloves, a jump pack, tools, hearing protection.
What actually matters if you build one
The slides are the build. Everything else is carpentry. Buy locking slides rated well above what you think you need, because a static load rating and a drawer bouncing down a washboard road are different problems, and a drawer that opens itself on a slope is a genuinely bad time.
Template the floor before you cut anything. Cardboard first. The floor has ribs, drain plugs, tie-down points and a slope, and none of it is where you expect.
Weight is the hidden cost. Plywood plus slides plus contents adds up quickly, all of it behind the rear axle. It changes how the truck rides and it eats payload.
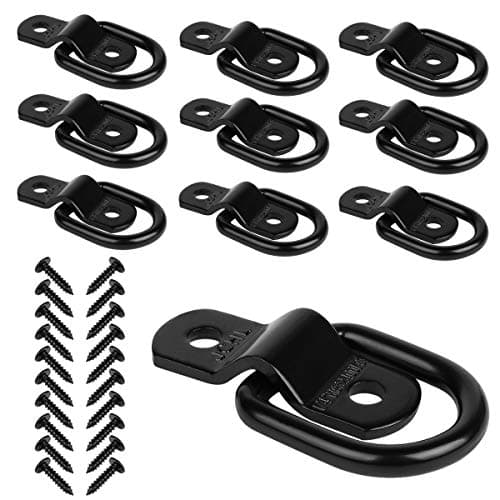
Anchor it to something structural. Factory tie-down points, or proper anchors through a backing plate. A hundred-pound drawer system that is not attached to the vehicle is a hundred-pound projectile.
The one part of the back I did not build
The drawers are mine. The panels are not. The MOLLE panel and cargo rack kit over the rear quarter glass and above the load deck is a bought modular panel system — an eBay purchase, and it cost me about $349.99. It arrived as a set of laser-cut panels with vehicle-specific mounts, and what I did was fit it, work out what hung where, and build the drawer system underneath it so the two worked as one storage system rather than two things in the same space.
That is worth saying plainly because it is the honest split on this whole build: some of it I made, some of it I bought, and a page that blurs the two is not much use to anybody deciding what to do with their own truck. The panels were the right thing to buy — cutting and finishing a rigid panel to the shape of that glass is a lot of work for a part that is available and not expensive. The drawers were the right thing to build, because a commercial system for this vehicle costs several times the plywood and slides and fits worse.
With the window panels in. Rigid MOLLE panels over the rear quarter glass turn dead vertical space into mounting points, which is exactly where a cargo area is short.
The same panels from inside, with the overhead one above the load deck. Vertical and ceiling space is the storage nobody uses.
What ends up on the panel matters more than the panel does. Mine carries the med kit and a small utility pouch, which is exactly the right use for it: the things you want to reach without unloading anything, hung where you can see them from outside the truck with the hatch open. Heavy items do not belong up there — a panel over glass is a mounting surface, not a shelf.
Project two: the front bumper and the winch
The new front bumper in daylight, with the light bar in the center aperture. The factory plastic bumper is gone and what replaced it is steel with a winch behind it.
Mid-install with the hood up. A bumper swap on a modern vehicle is as much an electrical job as a mechanical one — there are sensors, lights and harnesses in the factory bumper that all have to go somewhere.
Replacing a bumper is the project people underestimate. The mechanical part is straightforward — the factory bumper comes off, the new one bolts to the frame horns. The parts that take the time are everything else:
Weight, and what it does to the front end. A steel bumper and a winch together are a serious amount of mass hung ahead of the front axle. It changes the ride height, the steering feel and the suspension's working range. This is why people end up doing suspension after a bumper, whether they planned to or not.
The winch has to be wired to the battery properly. Not a convenience circuit — a winch pulls current on a scale nothing else on the vehicle does, and the cable, the terminals and the isolation all have to be sized for it. This is the one job on this page I would tell a first-timer to be genuinely careful with.
Everything the factory bumper was carrying has to be relocated. Fog lights, sensors, the license plate mount and the harnesses that fed them.
What the bumper and the winch actually are
The bumper was $173 on eBay. Textured black steel with a light bar in the center aperture, and no brand I can point you at — it is the kind of part that gets sold under a dozen names and I am not going to invent one. For $173 it is a lot of steel, and you can see in the daylight photo above that it fits the truck properly.
The winch is an X-BULL 12,000 lb electric winch, 12 volt, on synthetic rope. Also eBay: about $310, or $294 after a coupon. That number tells you most of what you need to know about where this build sits. A twelve-thousand-pound winch from one of the names starts around five hundred dollars and goes past a thousand very quickly, and what that money buys is a sealed motor, a gear train that survives repeated pulls without cooking, a clutch that engages every time, and a company that will still answer the phone in five years.
What a three-hundred-dollar winch is: a working winch that will pull a stuck 4Runner out of a hole. What it is not: a winch you should plan to work hard, repeatedly, on a hot day, a long way from help. I bought it knowing that. If you are buying at this tier, buy the synthetic rope version rather than steel cable — synthetic is lighter, it does not store energy the way a steel cable does when it fails, and on a budget winch the rope is the one component where the cheap version is genuinely dangerous rather than merely disappointing.
I have written about the recovery side of this properly on vehicle recovery gear, and the winch itself is a category covered in best winches. What is worth saying here is that a winch is a tool for getting yourself unstuck, and the shovel and the traction boards get used a great deal more often than the winch does.
Project three: the lights
Amber marker lights lit in the grille. These are the small ones that everybody notices first and that do the least actual work.
Three-quarter, markers on. The bar sits in the bumper aperture rather than on the roof, which keeps it out of the windshield's reflection.
The detail worth seeing: the long bar low in the bumper, a small cube pod beside it, and another pod up near the mirror. Three different lights doing three different jobs.
Head-on, everything on. The pods either side of the cowl are the ditch lights, and they are the ones that earn their money.
There are three kinds of light on the front of this truck and they are genuinely doing different jobs, which is the thing to understand before buying any of them:
The bumper light bar throws distance, straight ahead. It is the one that photographs well and the one you legally cannot use on a public road.
The cowl-mounted pods — ditch lights — throw sideways. They light the edge of the trail, the bank you are about to put a wheel on, and the animal that is about to step out. On an actual trail at actual speed these are more useful than the bar, and almost nobody fits them first.
The amber grille markers are marker lights. They are visibility to others, not illumination for you, and they are the cosmetic end of this.
If you are fitting lights in order of usefulness, it is pods, then bar, then markers. Almost everyone does it in exactly the opposite order.
The ditch lights, named
The pods either side of the cowl are the part of the lighting I can name exactly, because I ordered both halves of it in October 2024. The brackets are Nilight's 4Runner ditch-light brackets (the 91086B kit), and the lights are Rough Country 2-inch Black Series cubes in the flood beam. I bought them as Rough Country's 4Runner-specific kit; that kit is no longer listed, so the link goes to the same flood cubes sold as a pair.
Two things about that worth passing on. First, the brackets bolt to the hood hinges, which means the whole install is reversible and nothing gets drilled — that is the reason ditch lights are the easiest lighting job on this vehicle and the reason I would tell anybody to do them first. The hinge bolts are torqued hard from the factory, so bring a breaker bar rather than a ratchet, and do one side at a time so the hood stays aligned.
Second, and this is the part people get wrong: I bought the flood-beam version on purpose. Rough Country sells the same cube in a spot beam and it is the one that sells, because spot beams look impressive in a product photo. A ditch light is not a distance light. It exists to fill in the twenty feet either side of the truck that your headlights ignore, and a spot beam puts a hard bright circle a long way down a bank you were not looking at. Flood, every time.
One honest note on ordering: I have the Nilight brackets and the Rough Country lights, and vehicle-specific kits often ship with mounting hardware of their own. Read what is in your box before you order brackets separately — I did not, and it is a cheap enough mistake that I am telling you rather than pretending it did not happen. Buying the cubes on their own, as the link above now does, the brackets are definitely a separate purchase.
Both of those went in through the switch and relay setup in project four, which is the part of the lighting job nobody photographs and everybody underestimates.
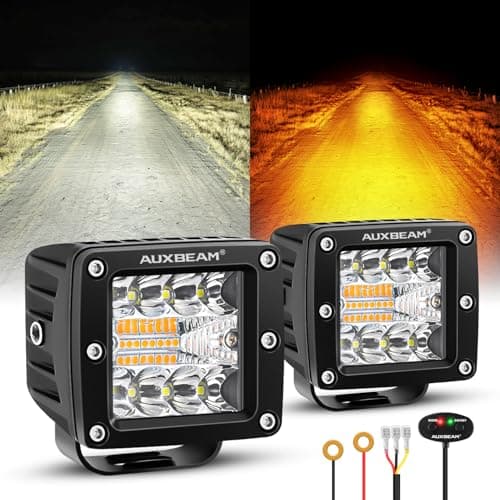
One specification worth paying for: an amber option on the pods. White light in dust, fog or falling snow reflects straight back at you and makes seeing worse rather than better. Amber does that far less. It is the difference between a light that works in the conditions you actually need a light in and one that does not.
Project four: the wiring, which is the real work
None of the above is visible in a photograph and all of it is the part that took the longest.
The switch panel, which is the whole point of doing this properly. The added rockers sit in the factory blanks beside the mirror controls and the 120-volt outlet — they look like they came with the truck, and that is deliberate.
New runs behind the dash. Color-coding as you go is the difference between a circuit you can fault-find in five years and one you cannot.
Where the accessory wiring lands in the engine bay. Relays and fusing live here, close to the power source, which is the correct place for them.
At the battery. Every accessory circuit starts here, and the terminal end is where a rushed job shows up first.
Trim off in the rear quarter to run wiring to the back. Most of an accessory-wiring job is taking interior panels off carefully and putting them back without breaking clips.
The principles I work to, in order of how much trouble ignoring them causes:
Fuse at the source, always. The fuse protects the wire, not the accessory. It goes as close to the battery as you can physically put it, because everything downstream of it is what the fuse is protecting.
Relays, so the switch is only carrying a signal. A dash switch running a light bar directly is carrying the full load through the dash, and it is a fire waiting for a bad crimp. The relay does the work; the switch just tells it to.
Loom, grommet and clamp every run. Split loom over the wire, a proper grommet at every pass-through, and a clamp or a tie every foot or so. Vibration plus a sharp edge equals a short, and it will happen at the worst possible time.
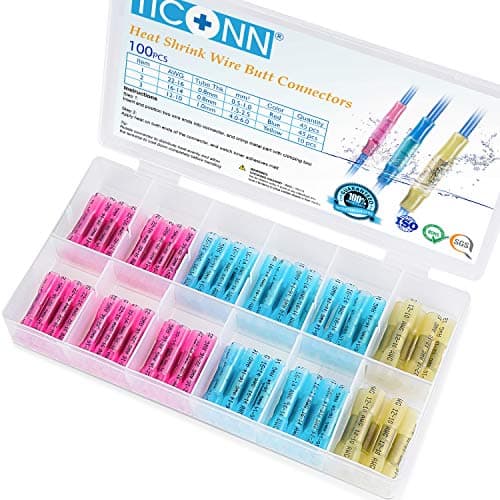
Adhesive-lined heat-shrink connectors outside the cabin. Not crimp caps, not electrical tape. The adhesive seals the joint against water rather than merely covering it.
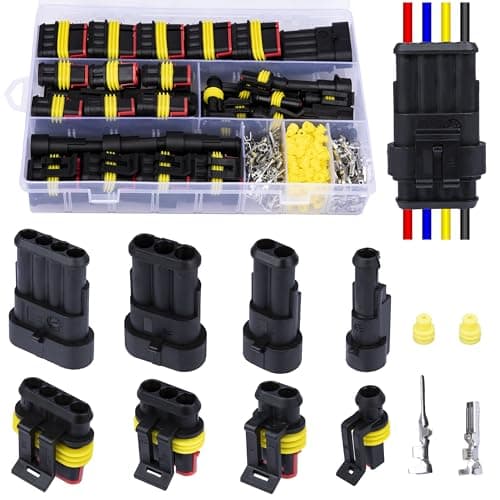
Plugs, not permanent splices. Every accessory should be able to unplug. The first time you have to pull the bumper you will understand why.
Switches in factory blanks. A 4Runner dash has spare switch positions. Using them looks right and, more usefully, keeps the wiring inside the dash rather than hanging under it.
The full version of this — relay wiring diagrams, fuse blocks, wire gauge against current and length, and the tools that make it survivable — is on 12V accessory wiring done right. That page is the theory; this one is what it looks like when it is in a truck.
Project five: my comms setup, and why it runs two systems
There is a question that comes up on every overlanding forum and never gets a straight answer: GMRS or CB? My truck answers it by running both, and once you see why, the argument mostly dissolves.
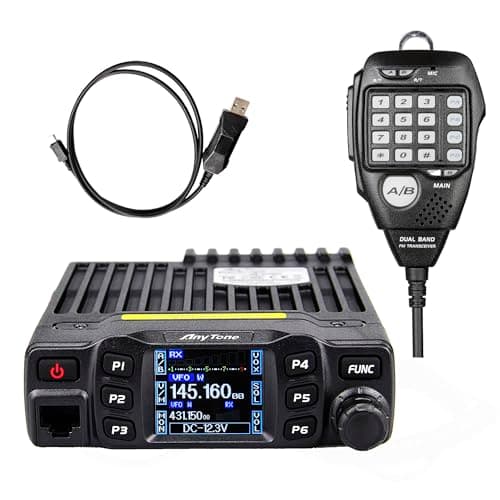
Both radios live in the center console bin. The mobile transceiver with the coiled mic cord is the AnyTone; the unit below it with the channel, squelch and volume knobs is the CB. Putting them in the bin instead of on the dash is the reason there is nothing bolted to the dashboard of this truck.
The whole point of that combination is that the truck is the base station and the handhelds work back to it. Somebody walks a line to spot a bad rut. Somebody wanders off from camp. Somebody is ground-guiding you backwards down a track you cannot see the end of. In all three cases one person is on a five-watt handheld and the other is on a twenty-five-watt radio with a proper antenna on a metal body — and that asymmetry is what makes the link work at distances where two handhelds would already be scratchy.
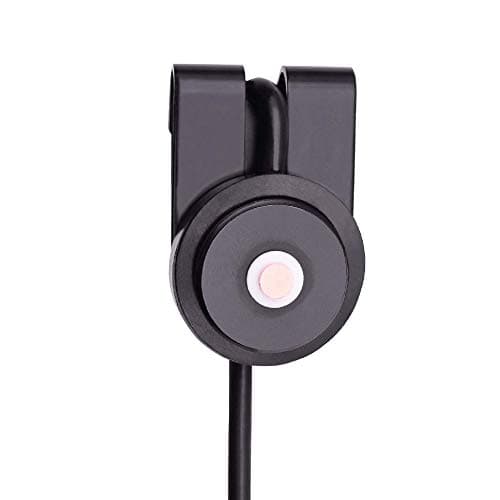
The lip mount at the hood seam, with the ghost antenna on it. No hole in the roof, and the clamp grounds to the body — which is the thing a magnetic base does badly.
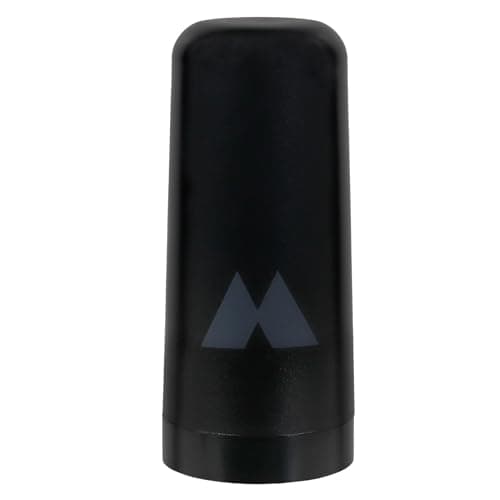
The ghost antenna is a deliberate compromise and it is worth explaining, because the internet will tell you to buy a taller whip. A 3 dB ghost gives up real range against a 6 dB whip. What it buys back is a truck that goes under garage doors, through car washes and under branches without you thinking about it — and an antenna you never take off is worth more than a better antenna you keep removing. On a hood-lip mount you are already compromising the ground plane compared with a roof-center hole, so the marginal loss from the shorter antenna is smaller than the spec sheet suggests.
The honest part: GMRS requires an FCC license. It is $35, there is no exam, it lasts ten years, and it covers your immediate family. That is genuinely all it is — you register, you pay, you get a callsign. There is no reason not to do it, and plenty of people running GMRS radios have not. Do it before you buy the radios, not after. FRS radios are the license-free option and they are power- and antenna-limited by rule, which is exactly why they do not reach as far.
One thing I will not do is tell you what any given radio is certified for. Buy the radio whose listing matches the service you are licensed for and read that listing carefully; "dual band" and "GMRS" are not the same claim, and the difference matters to the FCC even where it does not matter to the antenna.
The CB side: for talking to everybody else
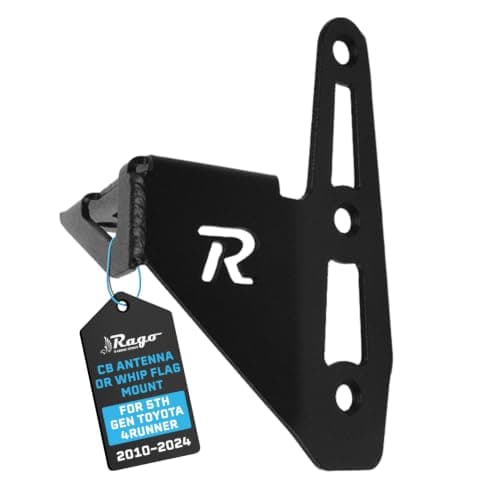
The second radio in that console bin is a compact 40-channel CB with NOAA weather — the label on the front of mine reads Midland. It feeds a whip on a Rago Fabrication tailgate CB antenna mount, which is a vehicle-specific steel bracket for the rear corner of a 2010-2024 4Runner.
The tailgate mount at the back corner, with the coax dropping down behind it. Putting the whip here instead of on the roof keeps the overall height of the truck honest and keeps the antenna out of the mirror.
So why bother with CB in 2026? Because GMRS is for your party and CB is for everybody else's. Organized trail runs, club convoys, a lot of rural traffic and most of the people who have been doing this for thirty years are still on CB channel 4 or channel 19. If you roll up to a group run with only GMRS, you are talking to yourself. If you run only CB, you have no repeaters, no privacy codes, less usable range for the money, and a four-foot whip on your truck for the privilege.
Running both costs a couple of hundred dollars and one afternoon of wiring, and it removes the question entirely. That is the actual answer to "GMRS or CB" and almost nobody gives it, because it is not the answer either camp wants.
The dash-top mounting rail, with a coiled cable running across it to the console. The radios are in the bin; what is on the rail is device mounts. Keeping the dash clear was the whole design brief.
What rides in the truck: the med kit
The med kit on the MOLLE panel, hatch open. Tan pouch with the red cross on it, black utility pouch beside it. It hangs where you can see it and reach it from outside the vehicle without climbing in or moving anything.
I keep a tactical med kit in this truck. That is the owner fact and it is the whole of it — I am not going to tell you it has been used in anger, because it has not, and I am not going to write a review of its contents as though I have tested them. What I will tell you is why it is mounted where it is and why the mounting decision is most of the value.
A med kit in the back of a drawer is a med kit you do not have. The whole reason it hangs on the panel is that in the two situations where it matters — somebody cut badly at camp, or somebody hurt at the side of a road — you will be moving fast, possibly in the dark, possibly with one hand already occupied. Hatch open, kit visible, grab and go. That is the only mounting standard worth applying, and it is why a MOLLE panel and a trauma kit are a natural pairing rather than a coincidence.
Because I am not going to fake first-hand experience here, I wrote the buying side up separately and honestly, as research: vehicle trauma and first-aid kits covers the first-aid-kit versus trauma-kit distinction, what belongs in a vehicle kit, how to mount one, and the thing that matters more than any of it — the counterfeit tourniquet problem, which is real, documented, and the single most important thing to get right before you spend a dollar on this category.
The short version, if you read nothing else: a tourniquet is the one item in a vehicle kit where a fake will kill somebody, and fakes are everywhere. Buy genuine, from a listing you can trace to the manufacturer, and get the training. A tourniquet you have never put on under pressure is a piece of webbing.
Shop the build: what I ran, what I paid, and the nearest equivalent
Most of this truck came off eBay, which is great for the wallet and useless for a parts list — the listings are gone, half of them never carried a brand, and I am not going to point you at an Amazon product and imply it is the thing bolted to my bumper.
So here is the honest version. For each of the eBay-sourced parts below: what I ran, what I paid for it, and the closest thing you can actually buy today. The equivalents are equivalents. They are not my parts, some of them cost more than I paid and some cost less, and every one of them is a live listing with a current price rather than a number I remembered. The parts I bought on Amazon and genuinely own are further down this page as ranked picks with an "I run this one" stamp — those two things are kept separate on purpose.
Rear MOLLE panel and cargo rack — I paid about $349.99
What I ran: a modular storage MOLLE panel and cargo rack kit for the 2010-2022 4Runner, bought used on eBay for roughly $349.99. Rear quarter-glass panels plus the overhead panel, no brand I can confirm.
What I ran: a textured black steel front bumper with an LED light bar in the center aperture, $173 on eBay. Unbranded as far as I can establish.
Closest current equivalent: the u-Box stubby steel front bumper for the 2014-2024 4Runner, with winch plate and LED light bar (affiliate link). Be ready for the price difference. A new stubby steel bumper is several times what I paid, and a full-width one is several times that again — my $173 was a used-market number and you should not plan a build around it. Check the live price on the link rather than on anything I say. Note the exclusions in that listing too: several 4Runner bumpers do not fit Limited and Nightshade trims, and that line is the one to read.
Winch — X-BULL 12,000 lb synthetic, I paid about $294
What I ran: an X-BULL 12,000 lb electric winch, 12 volt, synthetic rope. eBay, about $310, or $294 with a coupon.
Closest current equivalent — and this one needs a caveat. X-BULL does sell on Amazon, but at the time of writing their listings there top out well below 12,000 lb, so I cannot point you at the same brand in the same class and I am not going to pretend a 5,000 lb ATV winch is the same product. The honest equivalent is the tier, not the brand: the Nilight 12,000 lb 12V truck winch on synthetic rope (affiliate link) sits in the same place — same rating, same synthetic line, same budget shelf — and is what my money would buy today.
There are three rungs on this ladder and it is worth seeing all of them before you pick one. The budget rung is where I bought. The middle rung is Rough Country's 12,000 lb PRO series on synthetic rope (affiliate link), and the top rung is a WARN VR EVO 12-S (affiliate link)— roughly triple the budget tier the last time I looked, and you should check all three live rather than trust that. I bought at the bottom with my eyes open, and I would tell anybody planning to winch regularly rather than occasionally to climb.
CB radio — the class, not my exact unit
What I ran: a compact 40-channel mobile CB with NOAA weather in the console. The one in my truck carries a Midland label.
Closest current equivalent: compact mobile CBs come and go from Amazon constantly, and the reliably-listed one in this class is the Cobra 19 MINI, a 40-channel AM/FM compact CB (affiliate link). Same job, same size, same money. It is not the radio in my console and I am saying so rather than letting you assume.
Lighting and wiring — already covered below
The pods, the bar, the loom, the connectors and the switch hardware are all in the ranked picks further down this page, including the two ditch-light parts I actually own. The relays, fuse blocks and switch panels get the fuller treatment on 12V accessory wiring done right.
What is next, and what I am not claiming
The parts list on this page is now most of the way honest: the radios, the antenna hardware, the ditch lights and the winch are named because I have the orders or the owner knows what he bought, and the bumper and the cargo panel are described and priced rather than branded, because I would be guessing.
What is on this page: what I built, why, what I paid, and what I would do differently. What is not: invented part numbers, a suspension spec I have not confirmed, a claim that any of this was tested rather than used, or an Amazon link dressed up as one of my receipts.
Three of the decisions on this truck have their own pages, because each one is a category rather than a part. Rooftop tents is where the sleeping platform argument lives, 12V fridges covers the single most expensive thing in the back of a rig, and vehicle awnings covers the cheapest upgrade that changes how a camp actually feels.
Adhesive-lined heat-shrink butt connectors are the minimum standard for anything that lives outside the cabin. Ten dollars, and it is the difference between a repair and a recurring fault.
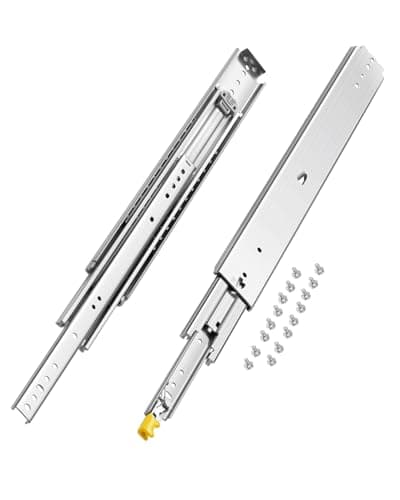
The hardware that decides whether a homemade drawer system is a drawer system or a box that sticks. Locking, full extension, and rated far above what a vehicle drawer actually carries.
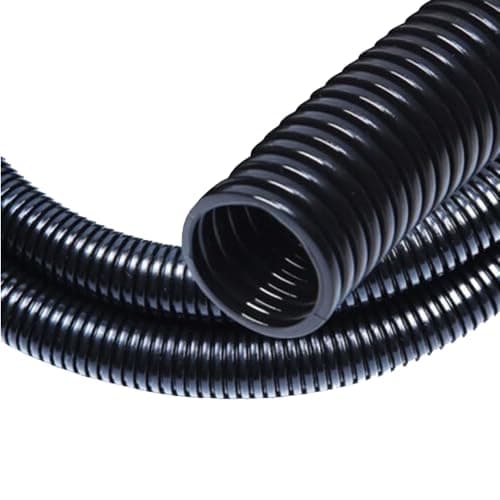
A pet cord protector that ranks in automotive loom searches. It may well be fine behind a TV; the listing states no temperature rating, and a vehicle is exactly where that rating is the whole point.
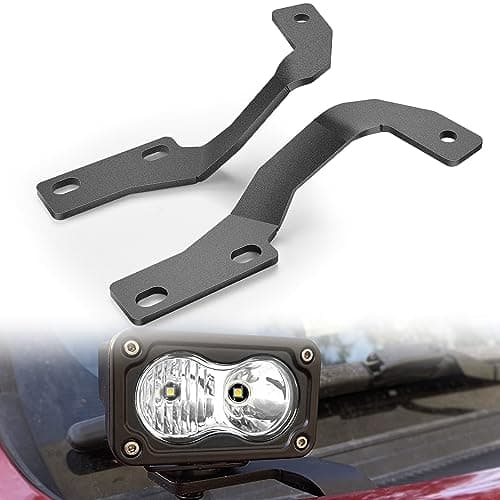
Twenty dollars of vehicle-specific steel that turns the hood hinge bolts into a pod mount. This is the part that makes ditch lights a bolt-on job instead of a drilling job.
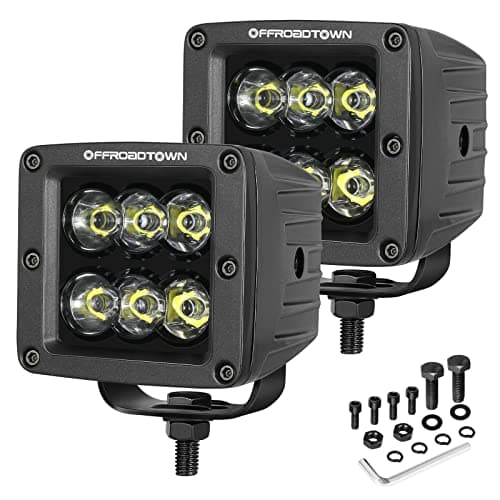
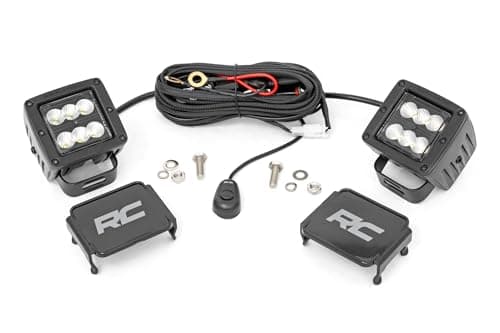
Two 2-inch Black Series cubes in a flood beam, sold as a pair with a harness and switch. Flood is the correct beam for a ditch light and almost nobody buys it that way.
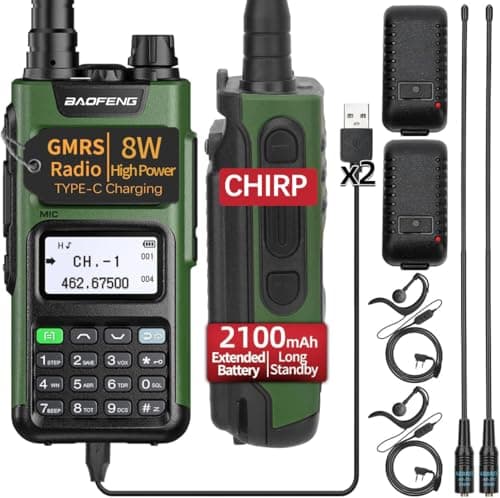
Two repeater-capable GMRS handhelds that charge on USB-C, for less than a single radio from the names. GMRS needs an FCC license — that part is not optional.
#ad · Live prices from the Amazon Creators API, as of October 19, 2026. Where we have no verified live price we show none — a gap beats a number that has rotted.
In detail
The picks, in full
01
Best value
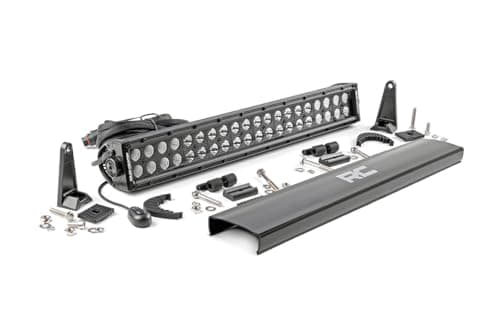
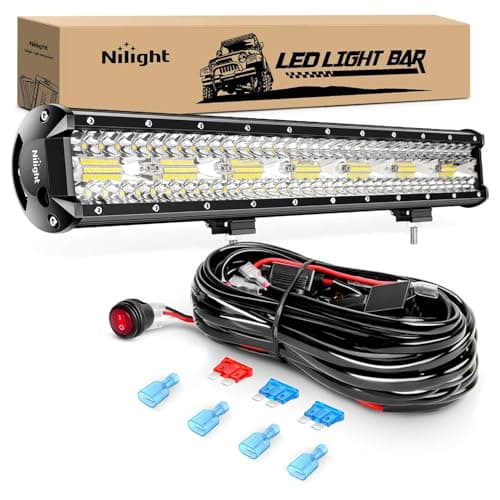
Nilight ZH409 20 in LED Light Bar
20 inTriple rowFlood/spot comboHarness included
7.6/10
Under fifty dollars with the wiring harness in the box, which is the part people forget to budget for and then bodge.
Output
8
Build quality
6
Wiring included
9
Sealing
6
Value
9
What's good
+The included harness has the relay and the inline fuse, so the install starts from a sane place
+Flood and spot in one bar covers both the trail and the distance
+Cheap enough that a rock strike is annoying rather than expensive
What's not
−Budget LEDs and budget housings — expect the finish and the seals to age faster
−Triple row is a deep bar; check it clears your bumper opening
Skip it if…
…the bar is going somewhere hard to reach. The cost of this class is that you will replace it sooner, and that maths changes if replacing it is a two-hour job.
Adhesive-lined heat-shrink butt connectors are the minimum standard for anything that lives outside the cabin. Ten dollars, and it is the difference between a repair and a recurring fault.
Sealing
9
Gauge range
8
Build quality
8
Value
9
What's good
+The adhesive lining seals the joint against water rather than merely covering it
+Color coding by gauge stops the most common crimping mistake
+Enough pieces for a whole accessory install with spares
What's not
−Needs a proper ratcheting crimper — pliers make a joint that pulls apart
−Butt splices belong in a harness, not hanging in free air
Skip it if…
…you do not own a ratcheting crimper yet. Buy that first; good connectors crimped badly are worse than cheap connectors crimped well.
VEVOR Locking Drawer Slides, 24 in / 500 lb (Pair)
24 in500 lb pair ratingFull extensionLocks open and closed
7.8/10
The hardware that decides whether a homemade drawer system is a drawer system or a box that sticks. Locking, full extension, and rated far above what a vehicle drawer actually carries.
Load rating
9
Locking
9
Extension
9
Weight
4
Value
8
What's good
+Locking in both directions is the specification that matters in a moving vehicle
+Full extension means the back of the drawer is reachable without unloading the front
+Ball-bearing slides keep working with grit on them, which cabinet slides do not
What's not
−Heavy — a pair adds real weight before the drawer or its contents
−The 500 lb figure is a static rating, not a rating for load bouncing down a trail
Skip it if…
…you are building a light gear shelf rather than drawers. Slides this heavy are wasted under a plywood platform with no moving parts.
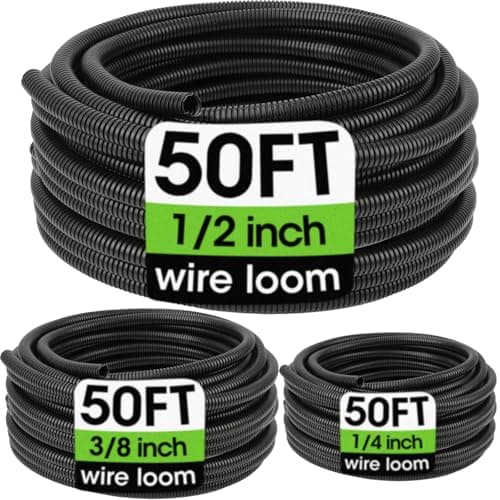
30 ft1/2 in onlyNo stated temperature ratingMarketed for pet cords
4.3/10
A pet cord protector that ranks in automotive loom searches. It may well be fine behind a TV; the listing states no temperature rating, and a vehicle is exactly where that rating is the whole point.
Coverage
4
Size range
3
Build quality
5
Value
5
What's good
+Cheapest split loom in the search results
+Fine for indoor cable management
What's not
−No stated temperature rating, and automotive loom lives near heat sources where that number decides whether it survives
−One diameter only, so it will not cover a real accessory-wiring job
−It ranks here on keyword overlap with automotive loom, not because it was made for the job
−The automotive kit above costs fourteen dollars more and covers three diameters
Skip it if…
…the loom is going in a vehicle. Buy conduit sold for automotive use, and check what temperature it claims.
Nilight Ditch Light Brackets for 2010-2023 Toyota 4Runner
I run this one
The brackets holding the pods on my hood hinges — Nilight's 4Runner ditch-light brackets (he ordered the 91086B kit in October 2024).
Fits 2010-2023 4RunnerHood-hinge mountSold as a pairBrackets only, no pods
8.3/10
Twenty dollars of vehicle-specific steel that turns the hood hinge bolts into a pod mount. This is the part that makes ditch lights a bolt-on job instead of a drilling job.
Fitment
9
Build quality
7
Install ease
8
Value
9
What's good
+Uses the factory hood hinge bolts, so nothing is drilled and nothing is permanent
+Vehicle-specific, which is the difference between pods that sit level and pods that point at the sky
+Cheap enough that it is not the decision on the build
What's not
−Brackets only — the pods and the wiring are separate purchases
−Hood hinge bolts are torqued from the factory and want a breaker bar, not a ratchet
Skip it if…
…your 4Runner is outside the 2010-2023 range on the listing. A ditch bracket is fitment hardware and a near-miss does not bolt on.
Price as of October 19, 2026. Prices move — Amazon's is the one that counts.
#ad · we may earn a commission from this link to Nilight Ditch Light Brackets for 2010-2023 Toyota 4Runner
13
Best ditch lights
Rough Country 2 in Black Series Cube LED Lights, Flood (70133BL)
I run this one
The cubes on the cowl of his 4Runner — Rough Country's flood-beam Black Series cubes, ordered October 2024 as the 4Runner-specific kit, wired through his own switch and relay setup.
Two 2 in Black Series cubesFlood beam, 2,880 lumens, 36WIP67 ratedFlat harness with switch included3-year warranty
7.8/10
Two 2-inch Black Series cubes in a flood beam, sold as a pair with a harness and switch. Flood is the correct beam for a ditch light and almost nobody buys it that way.
Beam control
8
Build quality
8
Fitment
7
Value
8
What's good
+Flood beam throws sideways, which is the entire job of a ditch light
+A named brand with a support line and a stated three-year warranty, at roughly double the cost of anonymous cubes rather than five times
+2-inch cubes are small enough that they do not sit in your own peripheral vision
What's not
−Sold as lights only — the 4Runner-specific kit that bundled brackets is no longer listed, so budget for a bracket set on top
−Costs about as much as a full budget light bar for two small pods
Skip it if…
…you want a spot beam for distance. Rough Country lists the same cube in spot and in DRL versions — buy the beam that matches the job, not the one that photographs best.
Price as of October 19, 2026. Prices move — Amazon's is the one that counts.
#ad · we may earn a commission from this link to Rough Country 2 in Black Series Cube LED Lights, Flood (70133BL)
14
Best truck-mounted base
AnyTone AT-778UVII Dual-Band Mobile Transceiver, 25W
I run this one
The mobile radio in his 4Runner's center console, feeding the low-profile antenna on the hood-lip mount. It is the base station the two handhelds work back to.
Dual band25 WVOXMobile/vehicle mount
7.4/10
A compact 25-watt dual-band mobile that fits where a vehicle actually has room. In this truck it is the base station the handhelds talk back to.
Output power
8
Size
9
Build quality
7
Ease of setup
5
Value
8
What's good
+Small enough to live in a console bin rather than needing a dash bracket
+25 watts from a vehicle supply reaches a great deal further than any handheld will
+Programmable channel memories with front-panel P1 to P6 keys, so trail channels are one button
What's not
−Programming these is done properly from a computer, and the cable is usually extra
−A mobile radio is only as good as its antenna and ground plane — budget for both
Skip it if…
…you have not worked out which service you intend to operate on and what license it needs. Buy the radio that matches the license you hold, not the other way around.
Price as of October 19, 2026. Prices move — Amazon's is the one that counts.
#ad · we may earn a commission from this link to Midland MXTA27 MicroMobile Universal Lip Mount (NMO)
16
Best low-profile antenna
Midland MXTA25 3dB MicroMobile Ghost Antenna
I run this one
The antenna on the hood-lip mount of his 4Runner.
3 dB gainLow-profile ghost bodyNMO baseMicroMobile compatible
8.0/10
A stubby 3 dB antenna on an NMO base, for people who want the radio to work and the truck to still fit under things.
Gain
6
Durability
9
Profile
10
Build quality
8
Value
7
What's good
+Survives car washes, garage lintels and low branches, which a whip does not
+Nothing to snag on a trail — the reason low-profile antennas exist at all
+NMO base swaps onto any NMO mount later
What's not
−3 dB is real gain but it is not a 6 dB whip — you trade range for the low profile
−Costs more than a taller antenna that would perform better
Skip it if…
…range is the whole point and nothing overhangs your parking. A taller gain whip outperforms a ghost antenna every time; the ghost is a packaging decision, not a performance one.
The pair he carries out of the truck — spotting, walking a line, or around camp, working back to the mobile radio in the 4Runner.
GMRS8 WRepeater capableUSB-C chargingTwo radios
7.4/10
Two repeater-capable GMRS handhelds that charge on USB-C, for less than a single radio from the names. GMRS needs an FCC license — that part is not optional.
Output power
7
Features
8
Build quality
6
Ease of setup
6
Value
10
What's good
+Sold in pairs, which is the only quantity a radio is useful in
+USB-C charging means the same cable as everything else in the truck
+Repeater capable, so where a GMRS repeater exists the range stops being line-of-sight
What's not
−GMRS requires an FCC license for the operator — $35, no exam, and it covers your immediate family
−Menu-driven programming is faster from a computer than from the keypad
−The supplied rubber antenna is the weakest part of any handheld at this price
Skip it if…
…nobody in the group will get the license. Unlicensed, these are the wrong radios and license-free FRS units are the honest answer.
Price as of October 19, 2026. Prices move — Amazon's is the one that counts.
#ad · we may earn a commission from this link to Rago Tailgate CB Antenna Mount, 4Runner 2010-2024
The order I would spend in
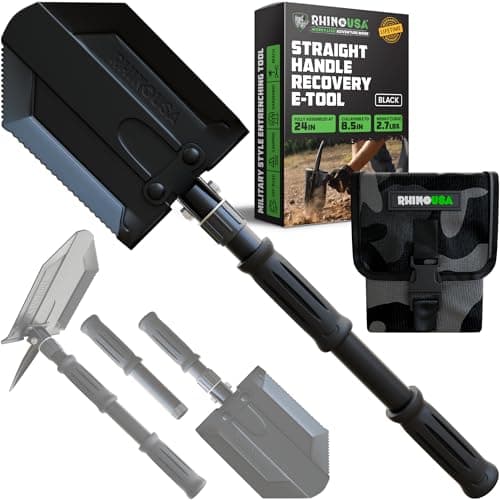
Recovery gear before anything bolted on. A shovel, traction boards and a strap will get you out of far more situations than a winch will, and they cost a tenth as much. See vehicle recovery gear and best recovery boards.
Storage. It changes how you use the vehicle every single day rather than on the four days a year you are actually off-road.
Lights — pods first. Ditch lights before a bar, and buy an amber option if you ever see dust or fog.
Wiring done properly, alongside the lights. Not after them. Retrofitting correct wiring onto an accessory you already bodged in is twice the work.
Bumper and winch last. Most expensive, heaviest, and the one that cascades into suspension work.
Wiring parts that are worth the money
The picks above are the wiring and hardware end of this build, and the honest ranking is that the boring parts matter most. Adhesive-lined heat-shrink connectors and split loom are twenty dollars between them and they are the difference between a circuit that works for ten years and one that gives you an intermittent fault you will never find.
Relays, fuse blocks and switch panels are covered in more depth, with picks, on 12V accessory wiring done right — there was no sense duplicating them here.
A note on the light bar tiers
There is a budget bar and a named-brand bar in the picks above and the gap between them is about four times the money. What that money buys is sealing and housing quality — the things that decide whether a bar survives five years of weather and vibration or two.
If the bar is somewhere easy to reach and you are fine replacing it, buy the cheap one; the light output difference is far smaller than the price difference suggests. If it is buried behind a bumper you would have to remove, buy once.
How these were picked
7 of these are mine. The rest are research, and I say which is which.
Anything carrying the "I run this one" stamp above is gear I actually own and use, and I write about it in those terms. What I do not do is invent numbers to dress that up — there are no group sizes, round counts or chronograph figures on this site, because I did not record them. For everything without the stamp: I read the manufacturer's published specification, compile the numbers that decide the purchase, do the arithmetic in the open, check the live price, and name one product to skip. Those scores are judgments against a published rubric, not measurements I took.
Questions
Frequently asked
Why isn't the bumper named when everything else is?+
Because I do not know what it is. It came off eBay for $173, textured black steel with a light bar in it, and it did not carry a brand I can trace. The same goes for the rear MOLLE cargo panel. Everything else on this truck is now named — the winch is an X-BULL 12,000 lb on synthetic rope, the ditch lights are Rough Country cubes on Nilight brackets, the radios are an AnyTone and a compact CB, the antenna hardware is Midland and the CB mount is Rago. Guessing at the last two would be exactly the kind of fabrication this site exists not to do, so shop the build gives you what I paid and the nearest thing you can buy instead.
GMRS or CB for overlanding?+
Both, and that is not a dodge — it is what is in my truck. GMRS is for your own party: more usable range for the money, privacy codes, and repeaters where they exist. CB is for everybody else — organized trail runs, club convoys and a lot of rural traffic are still on it, and if you show up to a group run with GMRS only, you are talking to yourself. Running both is a couple of hundred dollars and one afternoon, and it ends the argument. See my comms setup for how the two are wired and mounted.
Do I actually need a license for GMRS?+
Yes. GMRS is a licensed service in the United States: $35, no exam, ten years, and one license covers your immediate family. You register, you pay, you get a callsign. If nobody in your group is going to do that, buy FRS radios instead — they are license-free by rule, and they are power- and antenna-limited for exactly that reason, which is why they do not reach as far.
What med kit is in the truck?+
A tactical med kit on the MOLLE panel in the back, and that is deliberately all I will say — I am not going to review a kit I have never had to open. The mounting is the part worth copying: on the panel, visible with the hatch open, reachable without climbing in. The buying side is written up as research rather than experience on vehicle trauma and first-aid kits, and it leads with the counterfeit tourniquet problem because that is the thing most likely to get somebody hurt.
Is a drawer system worth building rather than buying?+
If you have the tools and the patience, yes — a commercial system for this vehicle costs multiples of the plywood and slides, and a built-to-fit system uses the awkward corners a universal one cannot. If you do not enjoy the work, buy one. The slides are the part you should not economize on either way.
Light bar or ditch lights first?+
Ditch lights, and it is not close. They light the sides of the trail at the speeds you actually drive it. A bar throws distance you can rarely use and cannot legally run on a road. Almost everybody buys them in the wrong order, myself included.
How much of this can a first-timer do?+
The storage and the lights, comfortably, with time and a template. The accessory wiring is very learnable and the 12V wiring page is written for exactly that. The winch power wiring is the one I would tell you to take seriously or hand to somebody who does this for a living — the currents involved are in a different category from everything else here.
We do not run a testing lab and we do not pretend to. Where a measured number came from a manufacturer's published specification or someone else's lab, we name them and link them. Where we could not verify something, we say so on the page rather than quietly leaving it out. Read the full method.