The kids call it the treehouse. It stands in the air on its own posts, in a corner of the yard with no tree holding up a single part of it. That turns out to be the better way to build one.
We earn a commission when you buy through our Amazon links, at no extra cost to you. It never changes the order of the picks, and we say so when the cheaper thing is the better buy. How this works.
My kids call it the treehouse. There is no tree in it.
It stands on its own posts in a corner of the backyard — a proper elevated platform with a playhouse on top of it, a deck, a rail, a slide and a climbing wall, and not one part of it touching the magnolia it sits under. If you have searched for how to build a treehouse without a tree, that is what this is, and I want to start by saying the quiet part out loud: not having a tree is an advantage.
Full build specs are coming; they are not here yet. You will not find a dimension, a lumber list, a cost or a timeline anywhere on this page, because I have not written mine down properly and an approximate number on a structure children climb on is worse than no number. What is here is the sequence, the reasoning and my own photographs. When I have the details written up, they go in as a proper specifications section — and the products below are the classes of part the job needs, researched rather than copied off my own receipts.
Where it ended up: painted, stained, railed, with a slide off one side and a climbing wall off the other. Everything holding it up is standing in the ground on purpose.
Why a freestanding build beats a tree build
People want a treehouse and assume the tree is the point. It is not — the elevation is the point. The tree is one way of getting there, and it is the way with all the problems.
You are not betting the build on a tree's health
A tree-supported structure is only as sound as the tree, permanently. Trees get sick, they get storm damage, they get root problems years after you finish, and every one of those is now a structural issue with a platform your children are standing on. A tree that has to come down takes the treehouse with it.
Posts in the ground do not develop root rot. If a post is ever wrong you replace a post, which is a job. Replacing a tree is not a job, it is a demolition.
You are not injuring the tree either
The honest version of tree-mounted building is that you are driving hardware through living tissue and then asking that tissue to carry load while it heals around the wound. It can be done properly — there is real engineering for it — and doing it properly is more specialized and more expensive than most people realize when they start.
The footing is engineered instead of inherited
This is the one that actually changed my mind. With posts, you decide the footing: how deep, what diameter, how much concrete, whether the post sits in the ground or stands off a base above it. Those are decisions with published guidance behind them from connector manufacturers and the American Wood Council. With a tree you inherit whatever the tree is doing and design around it.
You can put it anywhere
A tree build goes where the tree is. Mine went in the corner of the yard that was otherwise useless — against two fence lines, out of the way of everything, in shade. That is a siting decision I got to make rather than one that was made for me thirty years before I moved in.
The trade is honest: you do more work at the start. A tree build begins with a structure already standing. A freestanding build begins with holes.
Day one is the posts, and day one decides everything
Day one. Posts in, concrete going in around them, and a batten screwed across two of them to hold everything where it is while it goes off. This photograph is the whole build — every height, every square corner and every level line for the rest of the job is inherited from what is standing here.
There is nothing to look at in that picture and it is the most important day of the build. A post that is out of plumb is out of plumb permanently. A post that is an inch off the layout means every joist after it is an inch off, and you will spend the rest of the project fighting a mistake you made in the first two hours.
What that day is actually about:
Layout before digging. Get the footprint square on the ground and marked before a shovel goes in. Diagonals equal means square; there is no other check worth trusting.
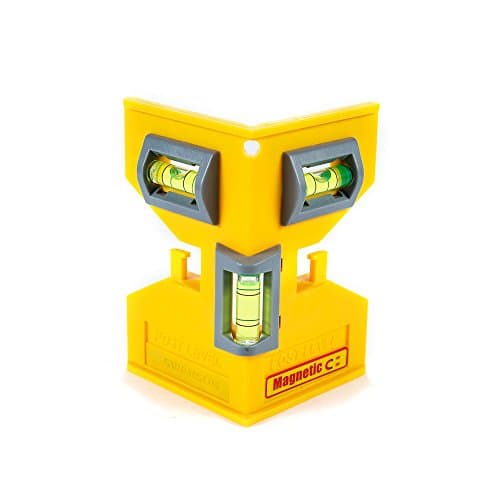
Plumb in two directions at once. This is why a post level exists — it wraps the corner and reads both faces, so you are not walking around the post with a torpedo level while the concrete sets.
Brace everything before you pour. Battens screwed between posts, braces to the ground, and then do not touch any of it. The photograph above has a batten across two posts for exactly that reason.
Decide your footing method deliberately. Post in the hole with concrete around it, or post standing on a base above the concrete. Both are real approaches with different trade-offs, and the choice is worth ten minutes of reading rather than a guess.
Platform framed and a roof structure standing above it. At this stage it is a table with a hat on, and it already tells you whether the post day went well — the roof either sits square on the platform or it does not.
The underside, which is the part nobody photographs and the part that is actually doing the work. Beams across the posts, joists across the beams, and a deck on top of that. This is also the space that ended up being the best bit of the whole thing as far as the kids are concerned.
Deck, then roof, then walls
Decking going down under the roof. Working on a platform rather than a ladder is the single biggest quality-of-life improvement in the build, which is a good argument for decking early even if the sequence feels backwards.
Shingles staged on the deck, waiting to go up. A roof this small still gets a real roof — sheathing, edge, shingles — because a play structure that leaks is a play structure that rots from the inside.
Roof on, walls going up. Cedar cladding, laid course by course, with the framing still visible through the open front.
A real window, in a real frame, in a real wall. This is the point where it stopped being a platform with a shed on it.
Cedar all the way round, doors braced and hung, window in. Everything above the deck is finish work; everything below it is structure.
Railings, and the bit that turns it into a playhouse
Rails on. On an elevated deck this is not decoration, and the spacing between balusters is the specification that matters most on the whole structure.
Slide on one side, climbing board with holds and a knotted rope on the other. Two additions, one afternoon, and the whole thing changes from a structure into a destination.
Painted white, with coach lanterns beside the door and solar caps on the rail posts. The lanterns were not my idea and they are the best thing on it.
At dusk with everything lit. This is the photograph that made the whole project worth it, and the reason I would tell anybody building one of these to spend the extra evening on the lights.
What I would tell somebody starting one
Three things, and none of them are about tools.
Spend your care on the posts and your money on the hardware. The lumber is the cheap part and the connectors are what turn a stack of wood into a structure. Structural screws, joist hangers and post bases have published load values behind them; deck screws and toe-nails do not.
Read the safety guidance rather than guessing at it. The CPSC publishes a Public Playground Safety Handbook covering fall zones, use zones, protective surfacing and guardrail geometry. It is free, it is specific, and it answers the questions people otherwise answer with a shrug. I am not going to paraphrase its numbers here — go and read the actual document for your actual build.
Build it taller than you think, and put something underneath. The space below the deck ended up being used as much as the house on top of it, and it cost nothing because it was going to be there anyway.
The part that decides how long the whole thing lasts. A standoff base holds the post about an inch clear of the concrete so water drains away instead of sitting against end grain.
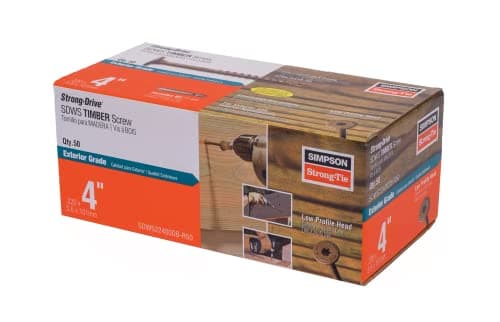
Structural screws are engineered fasteners with published values. Deck screws are not. On something a child climbs on, that distinction is the whole ballgame.
Nine dollars, and it is the tool that determines whether every subsequent cut is square. A post that is out of plumb on day one is out of plumb forever.
Cheap, transformative, and the reason a ramp becomes a route. A climbing board off the side of the deck is the highest fun-per-dollar addition on this whole page.
An oil-based penetrating stain that does not lap, does not need back-brushing and cannot really be applied wrong. On a structure with a hundred edges and corners, that matters more than the color.
Twelve dollars on the ladder treads and the deck edge. Treated pine plus rain plus bare feet is a genuinely slick combination and this is the cheapest possible answer to it.
#ad · Live prices from the Amazon Creators API, as of Sep 5, 2026. Where we have no verified live price we show none — a gap beats a number that has rotted.
In detail
The picks, in full
01
Best post base
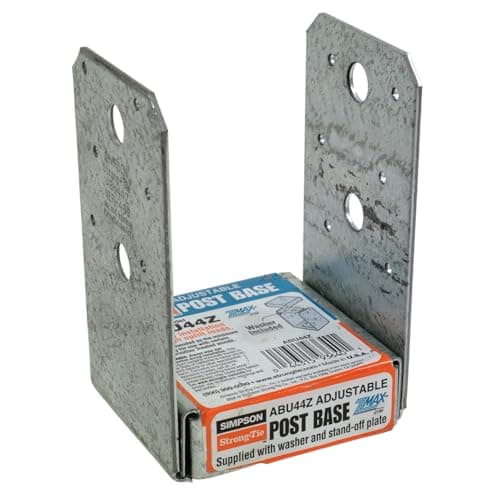
Simpson Strong-Tie ABU44Z Adjustable Standoff Post Base (4x4)
Fits 4x4 postsZMAX galvanized1in standoffAdjustable after the pour
8.5/10
The part that decides how long the whole thing lasts. A standoff base holds the post about an inch clear of the concrete so water drains away instead of sitting against end grain.
Longevity gained
10
Published data
10
Ease of install
6
Value
8
What's good
+The standoff is the entire point — a post that sits in a puddle rots from the bottom up, and no amount of stain fixes that
+Adjustable after the concrete goes off, which forgives the layout error every first-time builder makes
+ZMAX galvanizing is rated for the treated lumber it bolts to, which matters because modern treatment chemistry eats plain zinc
+Simpson publishes actual load values, so the connector is a specified part rather than a guess
What's not
−More expensive and more work than dropping the post in the hole and pouring around it
−Requires setting anchors accurately in wet concrete, which is a skill you acquire during the job
−Raises the post, which you have to allow for in your heights
Skip it if…
…you are burying the posts and pouring around them, which is a legitimate and very common approach and is what the photographs on this page show. Standoff bases are the alternative, not the only correct answer — read Simpson's installation instructions and pick deliberately.
Price as of Sep 5, 2026. Prices move — Amazon's is the one that counts.
#ad · we may earn a commission from this link to Simpson Strong-Tie ABU44Z Adjustable Standoff Post Base (4x4)
02
Best structural screws
Simpson Strong-Tie SDWS Timber Screws, 0.220 x 4in (50-pack)
0.220in x 4inExterior double-barrier coatingWasher headNo pre-drilling required
8.5/10
Structural screws are engineered fasteners with published values. Deck screws are not. On something a child climbs on, that distinction is the whole ballgame.
Structural rating
10
Coating
9
Ease of use
9
Value
6
What's good
+Published allowable loads, which is what separates a structural screw from a long screw
+Double-barrier coating rated for contact with modern pressure-treated lumber
+Washer head seats without a separate washer and does not bury itself in soft treated pine
+Drives without pre-drilling, which on a beam-to-post connection saves an hour of your life
What's not
−Several times the price of construction screws, which stings when you need a lot of them
−The correct screw length depends on the connection — this is a case for reading Simpson's guidance rather than eyeballing
−Not a substitute for a through-bolt where the design calls for one
Skip it if…
…you are fastening trim, decking or anything non-structural. Use ordinary exterior screws there and save these for the connections that carry load.
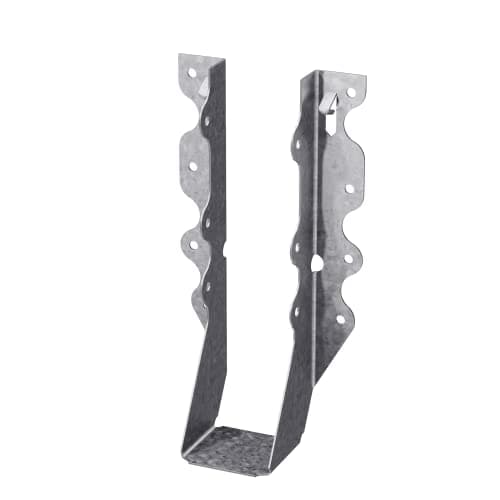
Toe-nailing a joist into a beam is how decks sag. A hanger transfers the load in shear, which is what the connection is actually being asked to do.
Structural value
9
Ease of install
9
Coating
7
Value
9
What's good
+Turns the weakest joint in a raised platform into a specified connection
+Fast to install and almost impossible to get badly wrong
+Cheap per connection against the consequence of getting it wrong
What's not
−Only works if you fill the nail holes with the fasteners Simpson specifies — the load rating assumes them
−Galvanized rather than ZMAX in this pack; check the coating against your lumber treatment
−Sized to the joist, so measure before you order
Skip it if…
…your joists sit on top of the beam rather than flush into it. A top-bearing arrangement is a different and often stronger detail, and it needs ties rather than hangers.
Price as of Sep 5, 2026. Prices move — Amazon's is the one that counts.
#ad · we may earn a commission from this link to Simpson Strong-Tie LU28 Face-Mount Joist Hangers for 2x8 (25-pack)
04
Cheapest thing that decides the whole build
Swanson Magnetic Post Level
Wraps two faces at onceMagnetic and strappedThree vialsReads plumb hands-free
8.3/10
Nine dollars, and it is the tool that determines whether every subsequent cut is square. A post that is out of plumb on day one is out of plumb forever.
Usefulness
10
Build quality
6
Precision
7
Value
10
What's good
+Reads two faces at once, which is the entire problem with plumbing a post and the reason a normal level is awkward
+Straps or magnets on and stays there, so both your hands are free for bracing
+Costs less than one bag of concrete and saves you from every error downstream of the posts
What's not
−Small vials are less precise than a good long level over a run
−The elastic strap is the part that eventually fails
−Magnets are useless on wood, so on timber posts you are relying on the strap
Skip it if…
…you already own a good torpedo level and enjoy holding it. This buys convenience and hands-free working, not accuracy you cannot otherwise get.
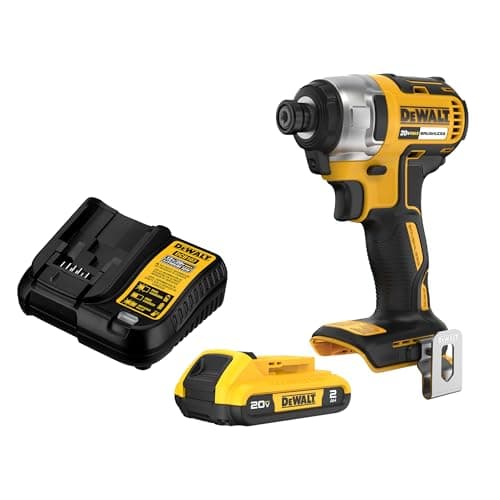
1/4in hex20V MAXBattery and charger includedCompact head
8.5/10
A drill will drive one 4-inch structural screw and then make you regret the project. An impact driver drives a few hundred of them without argument.
Capability
9
Ergonomics
8
Ecosystem
9
Value
8
What's good
+The impact mechanism delivers rotational hammer blows, which is what long screws into treated lumber actually need
+Compact enough to get between joists, where a drill will not fit
+The battery ecosystem is the real purchase — you will end up owning more tools on it
What's not
−Loud in a way a drill is not; hearing protection is not optional for a full day of it
−Poor at precise control, so it is the wrong tool for small fasteners and hinges
−You still need a drill for holes, so it is a second tool rather than a replacement
Skip it if…
…you already own any 18V or 20V impact driver. They are all adequate for this and the difference between brands is far smaller than the difference between having one and not.
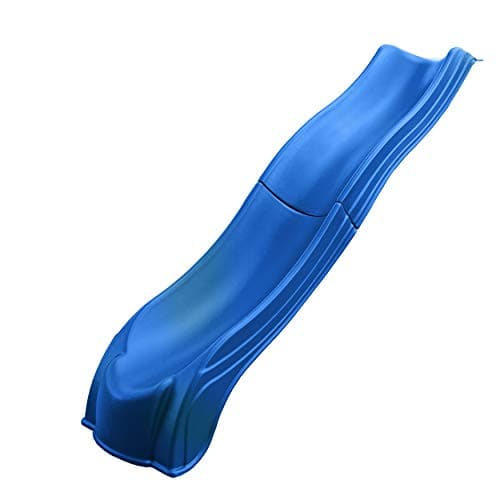
Sold for 5ft deck heightsTwo-piece plasticWave profileMounting hardware included
7.8/10
The single addition that turns a platform into a playhouse, and the one where deck height is a hard specification rather than a preference.
Fit to purpose
9
Durability
8
Ease of install
7
Value
7
What's good
+Deck-height-specific, so the exit angle at the bottom is what the manufacturer intended rather than whatever you ended up with
+Two-piece construction ships and stores in a way one-piece slides do not
+Rotomolded plastic survives sun and weather far better than the fiberglass slides it replaced
What's not
−BUY FOR YOUR ACTUAL DECK HEIGHT. A slide sold for a 5ft deck on a 4ft deck lands too shallow and on a 6ft deck lands too steep
−Bulky and awkward to move on your own
−Plastic in full Texas sun gets hot enough to matter in summer
Skip it if…
…you have not measured your deck height and checked the landing area. The CPSC handbook covers fall zones and use zones, and the slide exit needs clear space that is easy to forget when you are working in a corner.
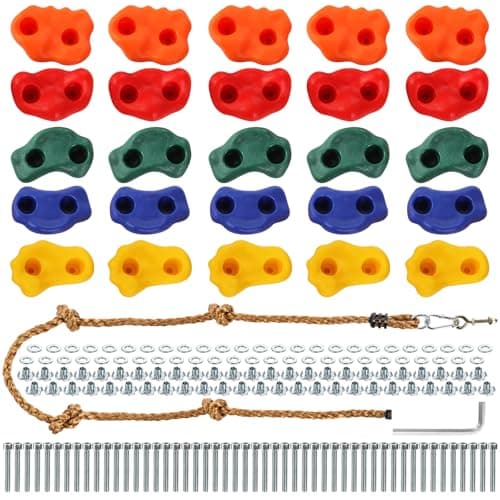
Cheap, transformative, and the reason a ramp becomes a route. A climbing board off the side of the deck is the highest fun-per-dollar addition on this whole page.
Fun per dollar
10
Completeness
8
Durability
6
Value
10
What's good
+Mounting hardware and a knotted rope in the box, so the board is a one-evening job
+Twenty-five holds is enough to set two genuinely different routes as a child grows
+Cheap enough to re-set the wall when it gets too easy, which is the point of holds over fixed rungs
What's not
−The supplied bolts assume a board thickness — check them against your material before you start
−Plastic holds fade and get chalky in direct sun over a few seasons
−A climbing board changes the fall zone under it, and that needs thinking about rather than assuming
Skip it if…
…the surface underneath is concrete or packed dirt. The CPSC handbook is explicit about protective surfacing under climbing equipment, and holds are the point where that stops being theoretical.
Price as of Sep 5, 2026. Prices move — Amazon's is the one that counts.
#ad · we may earn a commission from this link to Rock Climbing Holds Set with Mounting Hardware (25-piece)
08
Best finish
Ready Seal Exterior Wood Stain and Sealer (1 gallon)
Oil-based penetratingNo primer or wet-line neededSelf-leveling1 gallon
8.5/10
An oil-based penetrating stain that does not lap, does not need back-brushing and cannot really be applied wrong. On a structure with a hundred edges and corners, that matters more than the color.
Ease of application
10
Durability
8
Coverage
8
Value
8
What's good
+Forgiving in a way film-forming finishes are not — no lap marks, no runs to chase, no back-brushing window to miss
+Penetrates rather than filming, so it wears rather than peeling, which means the next coat is a wash rather than a sanding job
+Goes on with a pad, a brush or a sprayer, and all three work
What's not
−Takes days to reach its final color, which alarms everyone the first time
−Pressure-treated lumber needs to dry out before it takes any finish — this is the step people skip
−Not a film, so it will not give you the glossy look some people are after
Skip it if…
…the lumber is freshly treated and still wet. Nothing will hold, and you will have to strip and redo it. Check the manufacturer's guidance on dry time before you buy anything at all.
Price as of Sep 5, 2026. Prices move — Amazon's is the one that counts.
#ad · we may earn a commission from this link to Ready Seal Exterior Wood Stain and Sealer (1 gallon)
09
Best safety upgrade
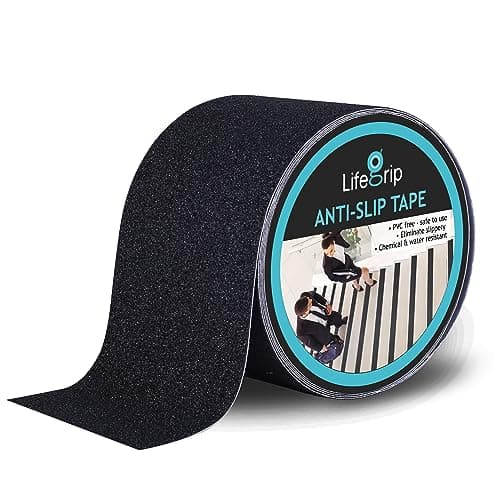
LifeGrip Anti-Slip Traction Tape, 4in x 38ft
4in x 38ft roll80-grit abrasiveOutdoor adhesiveCuttable to length
8.8/10
Twelve dollars on the ladder treads and the deck edge. Treated pine plus rain plus bare feet is a genuinely slick combination and this is the cheapest possible answer to it.
Safety gained
9
Durability
7
Ease of install
9
Value
10
What's good
+Solves the one hazard on a wooden play structure that is easy to overlook — wet timber underfoot
+One roll does every tread and both deck edges with tape left over
+Cuts with scissors and goes on in an afternoon
What's not
−Abrasive enough to take skin off a knee, which is a trade rather than a flaw
−Adhesive needs a clean, dry, stain-cured surface or it lifts at the edges within a season
−Looks industrial on a nicely finished build
Skip it if…
…the structure is under permanent cover and never gets wet. Otherwise this is close to a default purchase.
Connectors are specified parts — treat them that way
A joist hanger's load rating assumes every nail hole is filled with the fastener the manufacturer specifies. Half the holes filled is not half the strength, it is an unrated connection. Read the installation instructions, which are published and free.
Match your hardware coating to your lumber treatment
Modern pressure-treatment chemistry is corrosive to plain zinc. Galvanized is the minimum and heavier coatings like ZMAX exist for exactly this. Buying a connector that fits and then watching it corrode in three years is an avoidable and very common mistake.
Buy the slide for your deck height, not for the picture
Slides are sold by the deck height they are designed to leave from. The wrong one lands too shallow or too steep and there is no adjusting it. Measure first.
Let the lumber dry before you finish it
Fresh pressure-treated wood is wet and will not take a stain properly. Check the finish manufacturer's guidance on dry time — this is the single most common reason a beautifully built structure looks terrible after one season.
The cheap things matter more than the expensive things
A nine-dollar post level determines whether the whole build is square. A twelve-dollar roll of grip tape is the difference between wet treated pine and a safe tread. Neither is exciting and both punch far above their price.
How these were picked
I haven't handled these. Here's what I did instead.
Everyone in this category says they tested twenty of these. I haven't tested any, and I say so. What I do instead: read the manufacturer's manual and published specification, compile the numbers that decide the purchase, do the arithmetic in the open, check the live price, and name one product to skip. The scores above are judgments from that research against a published rubric — they are not measurements I took, because I do not have a lab and I am not going to pretend otherwise.
Questions
Frequently asked
Can you build a treehouse without a tree?+
Yes, and it is arguably the better way to do it. A freestanding elevated playhouse stands on its own posts, which means you choose the location, you design the footing, and the structure is not dependent on the long-term health of a living tree. Ours is exactly that — the family calls it the treehouse and no part of it touches a tree.
Is a freestanding playhouse better than a tree-mounted one?+
For most backyards, yes. You are not betting the structure on a tree that could get sick or storm-damaged, you are not driving hardware through living tissue, you can site it anywhere, and the footing is something you engineer rather than inherit. The trade is that you do more work at the start, because you begin with holes rather than with a structure already standing.
What is the most important part of the build?+
The posts, and it is not close. Every height, every square corner and every level line afterwards is inherited from them. Get the layout square before you dig, plumb the posts in two directions, brace everything before you pour, and do not touch it while it sets.
Should the posts go in the ground or on standoff bases?+
Both are legitimate. Burying the post and pouring concrete around it is simpler and very common — it is what the photographs on this page show. A standoff base holds the post clear of the concrete so water drains away rather than sitting against end grain, which is better for longevity and more work to install. Read the connector manufacturer's instructions and choose deliberately rather than by default.
What are the dimensions of yours, and what did it cost?+
Not published, deliberately. I did not write the numbers down properly, and an approximate dimension or cost on a structure that children climb on is worse than no number at all. Full specifications go on this page when I have them written up accurately.
Where do I find the actual safety requirements?+
The CPSC Public Playground Safety Handbook is the free, specific reference for fall zones, use zones, protective surfacing and guardrail geometry. Read it for your own build rather than taking numbers from any website, including this one.
We do not run a testing lab and we do not pretend to. Where a measured number came from a manufacturer's published specification or someone else's lab, we name them and link them. Where we could not verify something, we say so on the page rather than quietly leaving it out. Read the full method.