A $650 project bike, a top-end rebuild, a hand-welded oil tank and around $2,044 in new parts. It got to a rolling, wired, nearly-running cafe racer, and then it stopped. Here is all of it, including the ending.
We earn a commission when you buy through our Amazon links, at no extra cost to you. It never changes the order of the picks, and we say so when the cheaper thing is the better buy. How this works.
Let me put the ending first, because it is the part of this story that is actually useful to somebody thinking about a project bike.
I sold it. Not because it beat me, and not because it was a bad bike. I got it from a filthy non-running heap to a powder-coated rolling chassis with a rebuilt top end, a hand-fabricated oil reservoir, a custom wiring loom and no ignition key. And then it stalled, and I sold it, and the money went into the 4Runner.
That is what happens to most project bikes, and almost nobody writes it down. Projects compete — for money, for weekends, for the one bay in the garage. This one lost to a truck I was going to use every week. Everything below is what it cost, what I did, and what I learned, and none of it is worth less because of how it ended.
The day it came home. Complete, filthy, and not running — which is exactly what six hundred and fifty dollars buys you.
What $650 actually bought
A 1972 CB750 K2. Complete, seized-looking, decades of grime, and — this is the part worth reading if you are shopping — numbers that do not match.
Frame: CB750-2203157. A 1972 frame, which is what the bike is titled and described as.
Engine: CB750E-2463683. A 1974 to 1976 engine.
So it is a 1972 bike with an engine from two to four years later in it. Somebody, at some point, swapped a motor. That is completely normal on a fifty-year-old machine and I want to be plain about why it matters rather than treating it as a scandal:
Parts ordering gets harder. You are now looking up two model years. The engine parts and the chassis parts come from different pages of the catalog, and getting that wrong is how you buy the wrong carb kit.
Value takes a hit, honestly. A numbers-matching CB750 is worth more than one that is not, and if you are buying with an eye on resale you should price that in.
For a cafe build, it barely matters. You are cutting the subframe and throwing away the airbox. Originality left the conversation the moment you decided to build a cafe racer.
It changed nothing about my plans and it is the reason I got it at that price. Check the numbers before you buy, and then decide whether you care.
The frame plate on the steering head. Read this before you hand anybody money, and read the engine case too — they do not always agree.
Teardown
Everything came apart. Not a rolling refresh — a complete strip to a bare frame, because that is what you have to do if you are powder-coating and because a bike that has sat that long has something wrong in every system.
The single most useful thing I did here cost nothing: photograph everything, from more angles than feels necessary, before you undo it. Six weeks later you will not remember which way the washer stack went, and the photo will.
Coming apart. Bodywork, wiring and exhaust off, engine still in the frame — this is the stage where a project still looks like a bike.
And this is the stage where it stops looking like one. Everything that is not frame, forks and wheels is now in boxes.
Bare frame, tape measure out. Every fabrication decision on this build started here, and measuring twice is the cheap part.
The mock-up. Tank and seat sitting loose on the frame with nothing bolted down — this is how you find out whether the lines work before you cut anything.
The top end
I did not do a full engine rebuild. I did the top end, and I want to be exact about that because "rebuilt engine" means something bigger than what happened here.
The head came off so I could get at the pistons and clean the carbon off them and out of the combustion chambers. Decades of running deposits a hard carbon layer on the piston crowns and in the chambers, and that layer costs you compression and creates hot spots. Cleaning it off is a genuinely worthwhile job on a motor with unknown history and it requires nothing more exotic than patience.
The bottom end stayed together. Crank, rods and bearings were left alone, because there was nothing telling me they needed attention and opening a bottom end you have no reason to open is how a weekend becomes a season.
Top end open on the bench. Four cylinders, one camshaft, and a great deal of old oil.
Head off, pistons in the bores. This is the whole reason the top end came apart.
Down a bore. Photographing every cylinder like this before you touch anything gives you a record of what you found, and a reference for what you changed.
A piston out. The dark deposits on the crown are exactly what the job was about.
The head, cleaned up. Four chambers, eight valves, and a lot of hours with solvent and a soft brush.
What I am not going to tell you is what compression it made before or after. I did not put a gauge on it, and a number I did not measure is exactly what this site does not publish — the same rule that applies everywhere else, set out on how we pick.
Fabrication, and a friend with a welder
The part of this build I am proudest of is not mine. My friend Landon welded a custom oil reservoir for it, from sheet metal, to fit the space the frame actually had.
A CB750 is a dry-sump engine — the oil lives in a separate tank rather than in the bottom of the motor. On a stock bike that tank sits under the side cover. On a cafe build, where the whole point of the exercise is a clean triangle under the seat, the factory tank is exactly the wrong shape in exactly the wrong place. So you either buy an aftermarket one and work around its dimensions, or somebody makes you one that fits.
That is what a welder in your circle is genuinely worth, and it is the reason the good builds always seem to have one nearby.
Frame work. Cutting and cleaning up tabs — the part of a build that generates the most sparks and the least visible progress.
A threaded bung welded into the plate. Every fitting on a hand-made tank is a hole somebody had to cut and then seal.
The filler welded in. This is the difference between a box and a tank.
The finished reservoir. Shaped around the frame it has to live in, which is the entire argument for making one rather than buying one.
The other side, with the seams and mounting tabs. Zero dollars on the ledger and one of the most valuable parts on the bike.
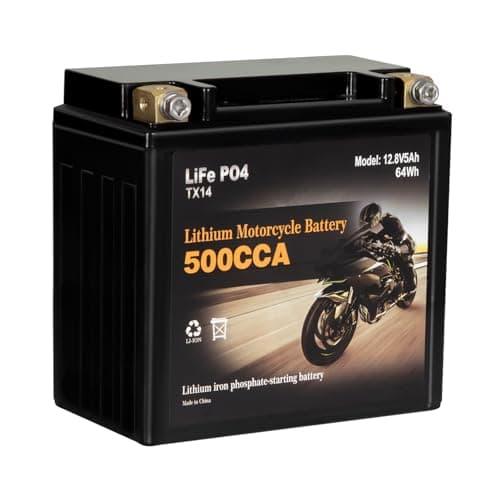
The battery went the same way. A lithium battery is a fraction of the size of the lead-acid brick it replaces, which is the whole reason a cafe build can hide its electrics — but "smaller" means it no longer fits the tray the factory gave you. So you measure the triangle you actually have and build a tray to that.
Measuring the space under the seat. Everything electrical on this build had to fit in there, and there is less of it than you think.
Test-fitting the battery by hand before committing to a tray. Group sizes are a guide; the tape measure is the authority.
Powder coating: $300 and the biggest single change
Three hundred dollars of coating, and it is the line on the ledger with the highest return on the whole build.
Powder coat over paint, for a frame, is not really a debate. It goes on thicker, it is dramatically harder, and it resists the fuel, brake fluid and boots that a motorcycle frame spends its life being attacked by. On a bike that is going to be stripped to the frame anyway, the marginal cost of coating everything rather than rattle-canning it is the best three hundred dollars in this story.
The catch is that powder coat is an all-or-nothing commitment. Everything has to be completely stripped, every bearing and bush out, every thread masked, because the whole lot goes in an oven. If you have not finished cutting and welding, do not book the coater — welding a coated frame means going back.
It is the same instinct as the cerakote refinish on my match pistol: the coating is the cheap and easy part, and the complete disassembly and correct reassembly around it is the actual job.
The tank, stripped back. Fifty years of paint and filler off, and the dents you inherited finally visible.
Hubs and rims back from coating. This is the moment a project stops looking like a pile of scrap.
The triple clamp, coated. Every threaded hole on a part like this has to be masked before it goes in the oven, or you spend an evening chasing threads afterwards.
Coated wheels with new rubber on them. Tires and mounting were about two hundred dollars of the build on their own.
Lights, switches, and no key
The electrical side is where this build got opinionated, and it is the thread that runs through everything else I do — the same reasoning as the twelve-volt wiring in the 4Runner and, at a smaller scale, the cable management in a PC build. Wiring you can trace is wiring you can fix.
Three decisions:
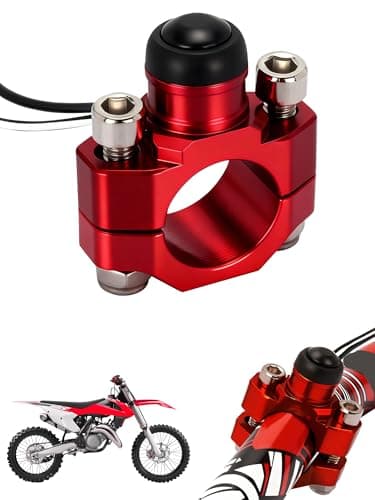
Buttons instead of an ignition key. The factory switchgear and the key barrel came off, and handlebar buttons went on. It is a cleaner arrangement and it looks right on a cafe bike. It also means the bike has no ignition lock, and that is a real trade you should make on purpose rather than because it looks good in photographs.
Universal bar switches. Two of them, laid out how I wanted the controls rather than how Honda arranged them in 1972.
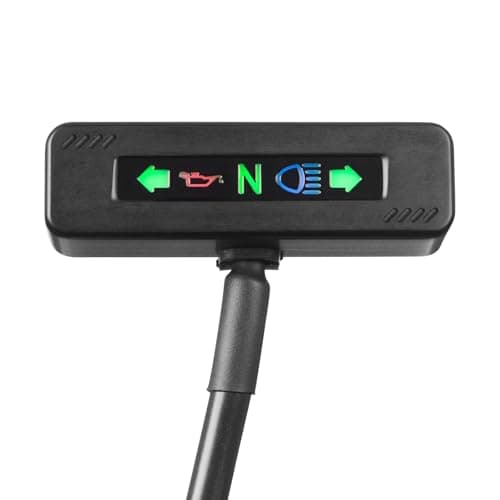
A five-light LED indicator cluster. Once the factory instrument pods are gone you still need turn, neutral, high beam and oil warning somewhere. A small cluster between clubman bars puts them back without a gauge pod.
The main harness came from CB750 Supply, and that is the right way to do it. A complete modern loom built for this bike is a fraction of the price of the weekends you would spend building one, and it comes with a diagram.
Front end back on. Coated forks, coated triple clamp, new bearings — this is the payoff for the teardown.
The loom going in. Everything electrical on this bike lives in the triangle under the seat, which is why the tray and the tank had to be made to fit around it.
The rider's view. Headlight, the small indicator cluster, and buttons where a key switch used to be.
And then it stopped
Look at those photographs and you can see how close it got. Rolling chassis, coated everything, new tires, rebuilt top end, a loom in it, controls on the bars.
Where it got to. Tank on, seat on, wheels in, and genuinely close to a running motorcycle.
The other side. Every part on it either came off, went to a coater, or was bought new.
Down over the seat. The last photograph in the sequence, and the one I look at when I wonder whether selling it was the right call.
What was left was the finishing: carbs on and synced, exhaust decided and fitted, fluids, fueling sorted, and then all the small unglamorous things that stand between a nearly-finished bike and a bike you can ride.
And that is where it stalled. Not one dramatic problem — the ordinary version. The remaining jobs were the fiddly ones, the weekends went elsewhere, and the 4Runner was a vehicle I would use every week rather than a project I would finish eventually.
I do not regret it and I would tell you the same thing. A project you have stopped enjoying is a project that is costing you garage space and guilt. Selling it to somebody who will finish it, and putting the money into the thing you actually use, is not a failure. It is just the version nobody posts.
The parts ledger — every number, as I paid it
This is the real spreadsheet. These are historical prices — what each part cost me at the time, not what it costs today. Sources are named as I bought from them; the current links to those shops are in the ecosystem section below. Items marked researched only are things I priced and specified but never actually bought.
Universal bar switches x2 — buttons instead of an ignition key
—
$35
5-light LED indicator cluster
Amazon
—
Cognito Moto mini speedo / tach — researched only
—
—
Dyna electronic ignition — researched only
—
—
MAC full and Tri-Y canister exhausts — researched only
—
—
Slipstream rearsets — researched only
—
—
Cafe fork conversion — researched only, via the Return of the Cafe Racers guide
—
Tools and finishing
Paid
Part
Source
$75
Blind-hole bearing puller
Harbor Freight
$300
Powder coating
Local coater
What a CB750 cafe build actually costs
Every estimate article you will read on this is somebody guessing. Here are real numbers from one real build.
The bike
$650
New parts, tools and coating
~$2,044
Total
~$2,694
Five things that number tells you, and they are the useful part of this whole page.
1. The bike is the cheapest part
Six hundred and fifty dollars of a twenty-seven-hundred-dollar build. The donor is under a quarter of the cost, which means buying a cheaper, rougher donor saves you almost nothing and buying a better one costs you almost nothing. Buy the best example you can find. Every hour you save on rust is an hour you spend on the build.
2. The finish is a bigger line than the engine
Powder coating was $300 and the top end was well under that in parts. That is not an argument against coating — it is the best money on the ledger. It is a warning that the costs on a cafe build are not where a first-timer expects them.
3. Consumables and small parts are the silent half
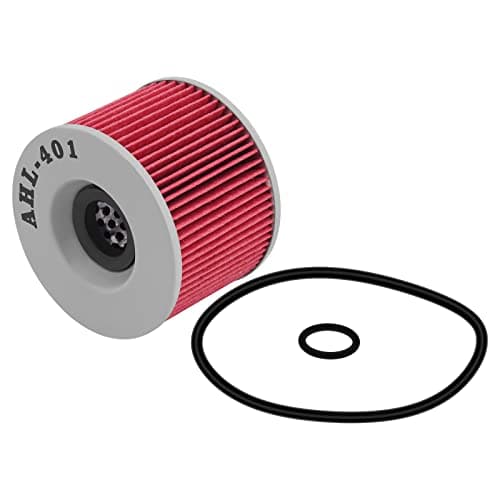
The seat, the hoop, the saddle, the levers, the bars, the throttle, the filters, the gaskets, the chain — none of them is a big number and together they are hundreds of dollars. The ledger above is the honest answer to "where did the money go?": it went twenty dollars at a time.
4. Suspension and wheels are half the chassis budget
Shocks, fork tubes, bearings and bushings came to roughly $400. Tires and mounting were another $300. That is $700 on making the bike roll and steer properly, which is more than the bike cost, and it is the least visible spending on the whole project.
5. This total does not include the exhaust or the finishing
Be honest about what $2,694 bought: a nearly-finished bike. The exhaust was still a researched line item. Carb tuning, fluids and the last round of small parts were still ahead. A realistic figure to a running, sorted, ridden cafe racer is meaningfully north of three thousand dollars — and none of that counts a single hour of labor.
If you want a rule of thumb from this: budget four times what the donor bike cost you, assume the finish and the chassis are where it goes, and treat any figure under that with suspicion.
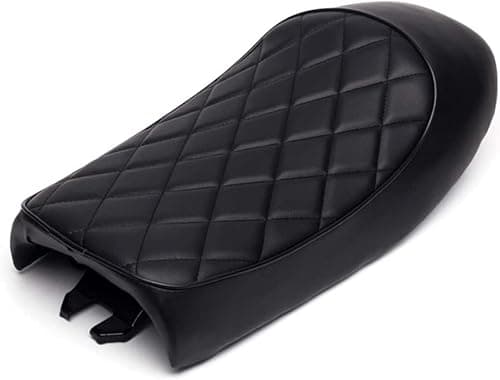
Names the CB750 in its own fitment line, which most universal cafe seats do not, and it lands within a few dollars of what a seat like this cost five years ago.
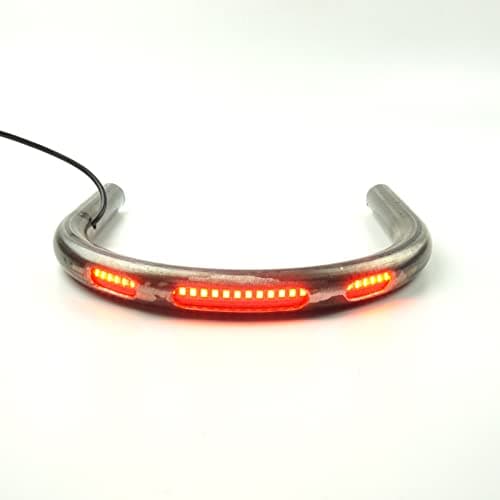
The loop and the tail light in one part, which removes the single most annoying fabrication job on a cafe build — mounting a light to a tube you just cut.
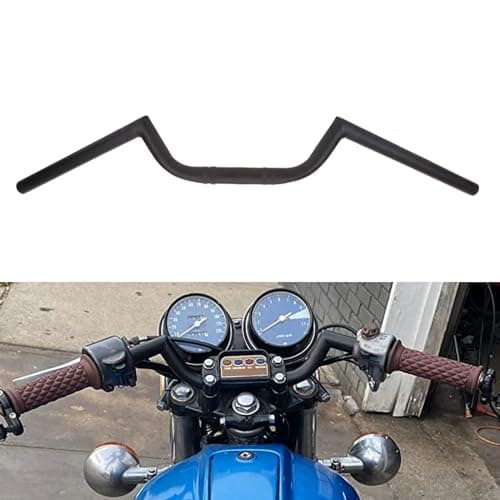
Clubman bars are what actually make a bike look and sit like a cafe racer, and at under thirty dollars this is the cheapest transformative part on the whole build.
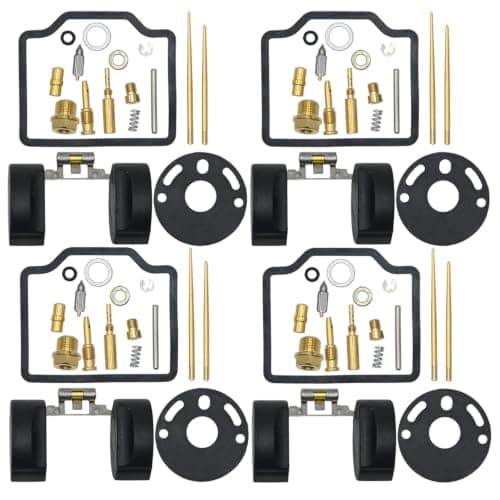
Four carburetors means four of everything, and buying them as a matched four-pack is both cheaper and the only way to be certain all four are the same.
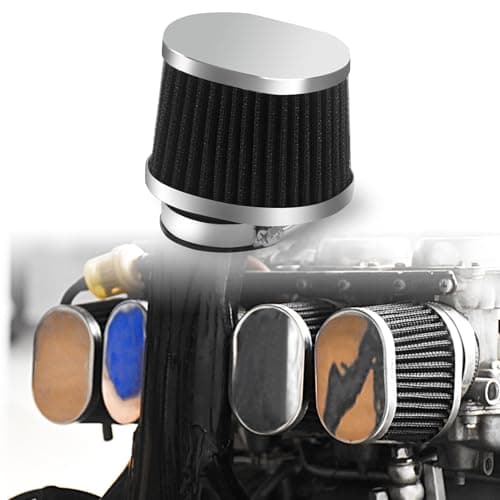
Pods are what a cafe build does instead of an airbox, and a four-pack in the right neck size is the whole purchase. Understand what they change before you fit them.
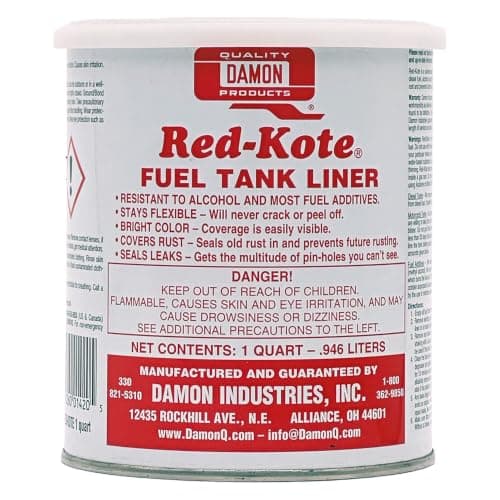
A fifty-year-old steel tank has rust in it. This is the stuff that stops the rust becoming a fuel-system problem, and it is the same product the old-bike forums have been using for decades.
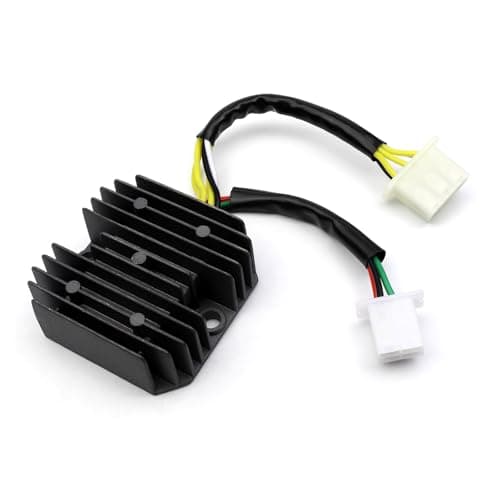
The single most common electrical failure on a bike of this age, and a solid-state unit replacing a mechanical regulator is a genuine upgrade rather than a like-for-like repair.
Lithium is how a cafe build hides its battery: a fraction of the weight and a fraction of the case volume, which is what lets it live in a small fabricated tray.
Turn, neutral, high beam and oil pressure in one 47mm housing. On a build that has thrown away the factory instrument pods, this is the part that puts the warning lights back.
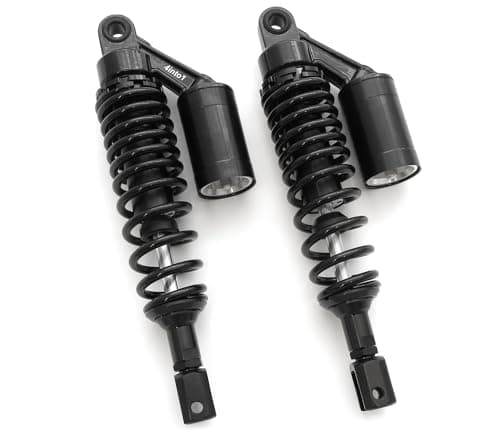
Eighty-five dollars for adjustable remote-reservoir shocks in the right length for a CB. The originals on a bike this age are fifty-year-old oil in a rusted tube.
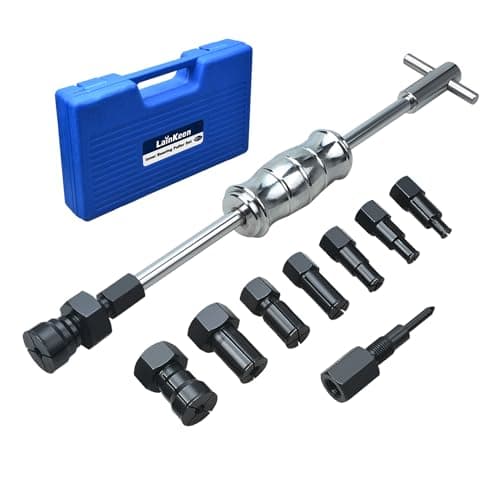
Wheel and swingarm bearings sit in blind holes and there is no other way to get them out without damaging something. Buy the tool; it is cheaper than the parts you will otherwise ruin.
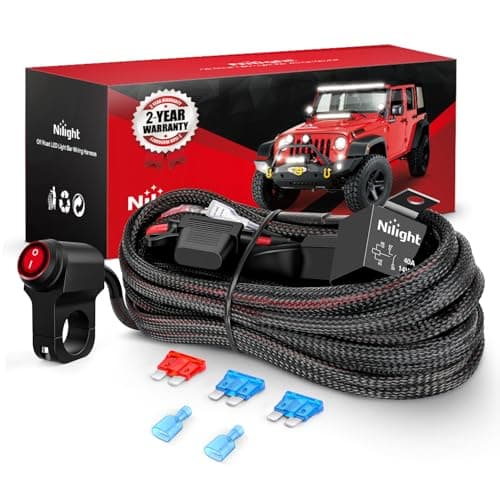
A perfectly good accessory-light harness that ranks near the top for "motorcycle wiring harness". It is not a main loom, and on a bike stripped to bare frame that is the thing you actually need.
#ad · Live prices from the Amazon Creators API, as of October 19, 2026. Where we have no verified live price we show none — a gap beats a number that has rotted.
In detail
The picks, in full
01
Best overall
RedCap Vintage Cafe Racer Saddle Seat
Universal cafe/bratFitment names CB750Vinyl over panBlack
7.3/10
Names the CB750 in its own fitment line, which most universal cafe seats do not, and it lands within a few dollars of what a seat like this cost five years ago.
Fitment clarity
8
Build quality
6
Mounting ease
6
Value
9
What's good
+The fitment list actually names the CB and CL Hondas rather than leaving you to measure
+Cheap enough that a mock-up seat and a final seat can be the same purchase
+The shape is the classic hump-free cafe profile that suits a stock-width subframe
What's not
−"Universal" still means you are mounting it yourself — expect to drill or fabricate a pan mount
−Vinyl and foam quality at this price is what you would expect at this price
Skip it if…
…your subframe has already been looped and shortened to a specific width. Buy the seat first, then cut the frame to it — not the other way round.
230mm flat loopIntegrated LED stripBrake and turnWeld-on
7.5/10
The loop and the tail light in one part, which removes the single most annoying fabrication job on a cafe build — mounting a light to a tube you just cut.
Fitment clarity
7
Build quality
6
Integration
9
Value
8
What's good
+Buying the light already built into the loop saves designing a bracket for it
+Flat loop suits a flat seat; the upswept version exists for a hump seat
+230mm is a common subframe width — measure yours before ordering
What's not
−It is a weld-on part, so this is not a bolt-on afternoon
−The LED strip is the cheap component in the assembly and the one that will fail first
−You are committing to a subframe width the moment you cut
Skip it if…
…you have not measured your frame rails. Loop width is the whole specification and there is no adjusting it afterwards.
Price as of October 19, 2026. Prices move — Amazon's is the one that counts.
#ad · we may earn a commission from this link to TADAFA Cafe Racer Seat Hoop with LED Brake Light
03
Best bars
AnXin 7/8 in Clubman Handlebar
7/8 in / 22mmClubman dropSteelBlack
8.5/10
Clubman bars are what actually make a bike look and sit like a cafe racer, and at under thirty dollars this is the cheapest transformative part on the whole build.
Fitment clarity
8
Build quality
7
Look
9
Value
10
What's good
+Changes the riding position and the silhouette in one twenty-minute job
+7/8 in is the standard vintage Japanese bar diameter, so controls transfer straight over
+Cheap enough to try the look before committing to clip-ons
What's not
−Clubman bars put weight on your wrists — this is a genuine comfort trade, not a styling-only choice
−Cable and hose length is the hidden cost; drops frequently need longer or shorter lines
−Steel rather than aluminum at this price
Skip it if…
…the bike is a commuter. A clubman bar on a bike you ride to work every day is a decision you will regret in traffic.
4 carburetorsCB750 1969-1976 fitmentFloats includedGaskets and needles
7.8/10
Four carburetors means four of everything, and buying them as a matched four-pack is both cheaper and the only way to be certain all four are the same.
Fitment clarity
8
Completeness
8
Build quality
6
Value
9
What's good
+A bike parked for years always needs this — old fuel destroys the soft parts first
+Fitment covers the whole first-generation CB750 range, which is what you want on a project with mixed-year parts
+Includes floats, which the cheaper kits often do not
What's not
−Four carbs is a long afternoon even when everything goes right
−You will still need to bench-sync and then vacuum-sync them afterwards
−Generic seller, so check the parts against your carb bodies before you strip anything
Skip it if…
…the carbs are seized or the bodies are corroded through. A kit does not fix a body, and a good used rack is sometimes the cheaper answer.
Pods are what a cafe build does instead of an airbox, and a four-pack in the right neck size is the whole purchase. Understand what they change before you fit them.
Fitment clarity
7
Completeness
8
Build quality
6
Value
8
What's good
+Removing the airbox is what frees up the space under the seat that a cafe build needs
+Sold as a matched four, which matters on a four-carb bike
+Fits the common CB-series carb neck range
What's not
−Pods change how the carbs breathe, so plan on re-jetting — this is not a bolt-on with no consequences
−They are far more exposed to rain and road dirt than an airbox
−Neck sizes vary by carb; measure yours rather than assuming
Skip it if…
…you are not prepared to tune the carburetors afterwards. Pods with untouched jetting is the classic cafe-build running problem.
A fifty-year-old steel tank has rust in it. This is the stuff that stops the rust becoming a fuel-system problem, and it is the same product the old-bike forums have been using for decades.
Effectiveness
9
Ease of use
4
Coverage
8
Value
6
What's good
+Seals pinholes and locks down surface rust in one job
+A quart does a motorcycle tank with margin
+Long track record on exactly this kind of tank
What's not
−This is the cheapest part of the job — the prep is days of work with a de-rusting solution and a lot of shaking
−A bad prep gives you a liner that lifts and blocks the petcock, which is worse than the rust was
−Notably more expensive on a marketplace than over an auto-parts counter, so check locally first
Skip it if…
…the tank is rusted through in a seam. A liner is not a structural repair and it will not save a tank that needs welding.
Cross-refs 31600-420-731CB650/750/900/1000Solid stateCombined unit
7.8/10
The single most common electrical failure on a bike of this age, and a solid-state unit replacing a mechanical regulator is a genuine upgrade rather than a like-for-like repair.
Fitment clarity
8
Upgrade value
9
Build quality
6
Value
8
What's good
+Replaces a mechanical regulator and a separate rectifier with one modern unit
+The listing states the Honda part numbers it supersedes
+Cheap relative to the charging problems it prevents
What's not
−Budget units in this class vary; some run hot and want real airflow
−Not lithium-specific — if you are running a lithium battery, that is a different unit
Skip it if…
…you are fitting a lithium battery. Lithium wants a regulator designed for it, and that is a considerably more expensive part from a specialist.
Lithium is how a cafe build hides its battery: a fraction of the weight and a fraction of the case volume, which is what lets it live in a small fabricated tray.
Weight saving
10
Packaging
9
Fitment clarity
6
Value
8
What's good
+Dramatically smaller and lighter than the lead-acid brick it replaces, which is the entire point on a build with no side covers
+No acid, no water and no sulfation, so a winter of not being ridden needs no maintenance
+The listing publishes exact case dimensions and terminal polarity, which is what a hand-made tray is measured against
What's not
−CHECK THE CASE DIMENSIONS AND TERMINAL POSITIONS against your tray before ordering — group size is a rough guide, not a fitment guarantee on a modified bike
−Lithium wants a charging system that suits it, which may mean a different regulator
−Rated to charge only down to -20C, and cold starting is where lithium is at its weakest
Skip it if…
…you have not confirmed your charging voltage. A lithium battery on an old, unregulated charging system is an expensive way to learn what the regulator does.
Turn, neutral, high beam and oil pressure in one 47mm housing. On a build that has thrown away the factory instrument pods, this is the part that puts the warning lights back.
Integration
9
Build quality
8
Size
9
Value
6
What's good
+Solves four separate indicator-mounting problems with one part
+Small enough to sit between clubman bars where a factory cluster will not
+Aluminum housing rather than the plastic pods in this class
What's not
−You are wiring four circuits into it, so it is only as good as the loom behind it
−Neutral and oil both need a sender wire found and identified on a fifty-year-old harness
−Expensive for what it physically is
Skip it if…
…you are keeping the factory gauges. This exists to replace them, and doubling up on indicators is money wasted.
320mm eye to clevisRemote reservoirPreload adjustablePair
7.0/10
Eighty-five dollars for adjustable remote-reservoir shocks in the right length for a CB. The originals on a bike this age are fifty-year-old oil in a rusted tube.
Fitment clarity
7
Adjustability
6
Build quality
6
Value
9
What's good
+Anything is an improvement over half-century-old dampers, and these are more than anything
+320mm is the common CB-series length; measure your eye-to-eye before ordering
+Preload adjustment lets you set sag for your actual weight
What's not
−Remote reservoirs at this price are as much a look as a function
−Damping is not adjustable, only preload, whatever the styling suggests
−Reservoir hoses need somewhere to live that is not against the swingarm
Skip it if…
…you are chasing real handling. A quality shock from a suspension specialist is several times this and is a different class of part; these are the honest budget answer.
Wheel and swingarm bearings sit in blind holes and there is no other way to get them out without damaging something. Buy the tool; it is cheaper than the parts you will otherwise ruin.
Necessity
9
Coverage
8
Build quality
6
Value
9
What's good
+The only correct way to remove a bearing from a blind bore, and the improvised methods all wreck the housing
+8-32mm covers motorcycle wheel, swingarm and steering-head work
+Roughly half what this tool cost at a chain tool store a few years ago
What's not
−You will use it a handful of times on one bike and then not for years
−Budget collets can slip on a bearing that is genuinely seized
Skip it if…
…you are paying a shop to press bearings anyway. This is a tool for people doing the whole job themselves.
Single accessory circuitHandlebar switchInline fuseNot a main harness
4.3/10
A perfectly good accessory-light harness that ranks near the top for "motorcycle wiring harness". It is not a main loom, and on a bike stripped to bare frame that is the thing you actually need.
Fitness for the job
2
Build quality
7
Coverage
2
Value
6
What's good
+Genuinely good for what it is — wiring an auxiliary light with a relay and a fuse
What's not
−It powers ONE accessory. A cafe build needs a complete main harness: ignition, charging, lighting, indicators, horn, neutral and oil senders
−It ranks for "motorcycle wiring harness" through keyword overlap, not because it does that job
−Buying this expecting a loom means starting the electrical phase with the wrong part on the bench
−A proper CB750 harness comes from a vintage-Honda specialist — CB750 Supply is where his came from, and it is not on a marketplace
Skip it if…
…you are rewiring the whole bike, which on a build like this you are. Buy the main harness from a specialist and use something like this only for accessories afterwards.
The CB750 parts ecosystem, and where the picks fit in it
The single most useful thing I can hand you from this build is not a parts list — it is the map. A vintage Honda sits in a small, specific ecosystem of shops, and knowing which one does what turns the project from frustrating into merely slow.
None of the links in this section is an affiliate link and we earn nothing from any of them. They are here because they are the right answer.
The vintage-Honda parts houses
4into1 — the CB-series parts house. Their catalog is organized by make, year and model, which is exactly what you need on a bike with mismatched numbers. My swingarm bushings came from here.
CB750 Supply — where the wiring harness came from, and where I would send anybody rewiring one of these. A complete modern loom built for the bike is worth every penny.
Cycle X — CB750 chopper and cafe specialists. The fork tube kit came from them.
Scrambler Cycle — reproduction parts; the petcock came from here. Note their site currently states they no longer ship internationally.
CBX Performance — vintage Honda performance and rebuild parts. The brass swingarm bushings came from them.
The cafe-specific shops
Carpy's Cafe Racers — my steel battery and electrical tray came from here. Read this one before you plan around it: as of this writing the site carries a retirement notice, and it says the web store has run its course after twenty-six years. Parts may still surface through other channels, but do not build a plan around ordering from the site.
Cognito Moto — cafe parts and front-end conversion specialists. Their mini speedo and tach were on my list and I never bought them.
Return of the Cafe Racers — not a shop. Build features and guides, running since 2006, and where the fork conversion I researched was written up.
Everything else
RevZilla — tires. Both Continentals came from here.
Dynatek — electronic ignition. Researched, never fitted.
MAC Exhaust — the full system and Tri-Y canister options I priced and never ordered.
All Balls — bearing and seal kits. Their site blocks non-browser clients so we do not link it; search the part number (mine were 22-1011, 25-1362 and 25-1307) through a dealer.
Slipstream — rearsets, researched only. Their domain did not resolve when we checked, so there is nothing to link.
What of this is actually on Amazon
Read this before you use any link on this page. The vendor URLs in my original spreadsheet are from 2019 and 2020 and most of them are dead. The picks above are not the exact SKUs I bought — they are current equivalents found by model and description, and their prices are live rather than historical. Cross-check the fitment against your own bike before ordering anything.
Where no honest equivalent exists, there is no link, and that covers a lot of this build:
The Continental TKC 70 in my sizes. 100/90-19 and 4.00x18 are not currently listed. Other TKC sizes are, and they are not the same tire for your bike. Buy tires from a motorcycle tire retailer where the sizing is filterable.
The All Balls kits. 22-1011, 25-1362 and 25-1307 did not come back on a part-number search, and a bearing kit that is nearly right is a bearing kit that is wrong.
The Cycle X fork tube kit, the CB750 Supply harness, the Carpy's tray and the Scrambler Cycle petcock. These are specialist parts from specialist shops and that is where they should be bought.
The one to watch out for is in the picks above as the skip: search "motorcycle wiring harness" and the top results are accessory light-bar harnesses, not main looms. They are good products for a completely different job.
If you are about to start one
Check the frame and engine numbers before you pay. Then decide whether you care. For a cafe build you probably do not; for resale you should.
Buy the best donor you can afford. The bike is a quarter of the budget. Saving two hundred dollars on a worse one is a false economy measured in weekends.
Photograph everything before you undo it. Free, and you will use them.
Finish all cutting and welding before the coater. Powder coat is all-or-nothing and welding a coated frame means doing it twice.
Buy the main harness, do not build one. Build the accessory circuits yourself if you want to learn; buy the loom.
Decide honestly how much you want to ride it. That is the question that actually determines whether a project gets finished, and it is the one I answered late.
How these were picked
I haven't handled these. Here's what I did instead.
Everyone in this category says they tested twenty of these. I haven't tested any, and I say so. What I do instead: read the manufacturer's manual and published specification, compile the numbers that decide the purchase, do the arithmetic in the open, check the live price, and name one product to skip. The scores above are judgments from that research against a published rubric — they are not measurements I took, because I do not have a lab and I am not going to pretend otherwise.
Questions
Frequently asked
Do mismatched frame and engine numbers matter?+
For a cafe build, barely — you are modifying the bike anyway and originality is already gone. For parts ordering it matters a lot, because you are now looking up two model years. For resale value it matters, and you should price it in when you buy. Mine was a 1972 frame with a 1974-76 engine and it is the reason I got it at that price.
Is $2,700 realistic for a CB750 cafe racer?+
For what mine actually was — a nearly-finished bike — yes, and those are real numbers rather than an estimate. To a running, tuned, road-ready bike you should assume meaningfully more than three thousand, because the exhaust, the carb tuning and the last round of small parts were all still ahead of me. None of it counts labor.
Powder coat or paint the frame?+
Powder coat, if the bike is coming apart anyway. It is thicker, much harder, and shrugs off the fuel and brake fluid that kill paint on a motorcycle frame. The condition is that everything must be stripped and every thread masked, and all your cutting and welding must be finished first.
Why get rid of the ignition key?+
It is cleaner and it suits the bike. It also removes the ignition lock entirely, which is a genuine security trade rather than a styling detail. I would do it again on a bike that lives in a garage; I would think hard about it on one that gets parked in public.
Do you regret selling it?+
No, and I have thought about it properly. It had stopped being the thing I wanted to spend weekends on, and it was taking up the space and the budget of something I would use every week. A project you have quietly stopped enjoying is costing you more than money. Selling it to somebody who would finish it was the right call.
What would you do differently?+
Decide the exhaust early. It was the one big system still unresolved when the project stalled, and an unresolved system at the end is exactly the kind of thing that turns "nearly done" into "still nearly done" six months later.
We do not run a testing lab and we do not pretend to. Where a measured number came from a manufacturer's published specification or someone else's lab, we name them and link them. Where we could not verify something, we say so on the page rather than quietly leaving it out. Read the full method.