Cable Management, Before and After: What 15 Years of Enterprise Wiring Teaches You
My own photographs of racks I inherited and racks I left behind, plus the honest reason good wiring goes bad — and the small, unglamorous toolkit that is most of the difference.
We earn a commission when you buy through our Amazon links, at no extra cost to you. It never changes the order of the picks, and we say so when the cheaper thing is the better buy. How this works.
This is the one part of this site where I am not a hobbyist. I have spent roughly fifteen years in enterprise networking and cloud infrastructure — a CCNA, multiple Azure certifications, the AWS Solutions Architect certification, and hands-on work on Fortune 100 deployments on the Microsoft stack. The full version of that is on the about page, along with the reason I do not extend it one inch into knives or fishing reels.
What follows is the part of that job nobody photographs for a brochure. Every image on this page is mine, from real work, and every one of them has been cropped or excluded on the same rule: nothing in frame identifies a client, an employer, a facility or a machine. Where a good photograph had a readable label at the edge I cropped it out. Where a label could not be cropped away without destroying the shot, the photograph is not here. There are frames I would have loved to publish that you will never see, and that is the correct trade.
There are no dates, no locations and no names below, and there is one more absence worth stating plainly: I am not going to show you a real labeling scheme. I will describe how to build one, at length, because it is the most valuable habit in this entire discipline. But a labeling scheme is a map of a network. Publishing one is the single most useful gift you could hand somebody who has no business having it.
Part one: the hall of shame
Start here, because starting with the finished rack is how this subject gets turned into smugness. Almost nobody builds a mess on purpose. Every one of these was, at some point, somebody's tidy rack.
Every color of cable in the building, and not one of them supported. Nothing here is wrong electrically. It works. It is simply impossible to change.
So how does it happen? Four ways, and I have watched all four.
Entropy is the default state, not the failure state
A rack is not a static object. It is a place where people make changes under time pressure, one at a time, for years. Every single one of those changes is small and reasonable. Nobody ever decides to make it worse. The mess is not a decision — it is the sum of a few hundred correct-in-isolation decisions, none of which had time budgeted for re-dressing the bundle they went into.
This one is single-color and still unnavigable, which tells you color coding is not the answer on its own. The cable is doing nothing wrong. It is just going nowhere in particular on the way there.
Turnover erases the reasoning, not the wiring
The person who built a rack knows why the third panel is patched the way it is. When they leave, the wiring stays and the reasoning does not. The next person cannot safely remove anything, because nothing tells them what is live. So they add. And the person after them adds. A rack that has survived three handovers is usually carrying a significant amount of cable that goes to nothing at all, and nobody in the building has the standing to pull it.
This is the strongest practical argument for labeling, and it has nothing to do with tidiness. An unlabeled rack is a rack where the correct action is always "leave it". That is how you get a hundred dead cables.
There are horizontal managers fitted between every panel here — the hardware to do this properly was bought and installed. The cords simply stopped being routed through it. This is the most common failure I see, and it is a habit failure, not a budget one.
"Temporary" is the longest-lived state in infrastructure
A cable run across the floor for a demo. A switch on a shelf for the duration of a migration. A patch cord looped over the top of a panel because the right length was not in the box that day. All genuinely temporary, all genuinely intended to be tidied on Monday, and Monday has a different emergency in it.
I have stopped treating this as a discipline problem. It is a scheduling problem. The only thing that has ever fixed it for me is putting the tidy-up in the same change window as the work, so it is not a separate task competing with a separate priority.
Look at the loops. Every one of them is somebody who had a cable four feet longer than the job needed and no cable of the right length within reach. Buying patch cords in sensible lengths is a surprisingly large part of this entire discipline.
Wrong-length cable is the root cause more often than laziness
If the only patch cord in the building is seven feet long, every one-foot connection becomes six feet of slack that has to go somewhere. It goes into a loop, the loop joins the other loops, and within a year the loops are the rack. I have walked into rooms where the entire mess traced back to a purchasing decision — one bulk box of one length — made by somebody who never opened the cabinet.
Cable on the floor is where this stops being aesthetic. Anything on the floor gets stood on, rolled over, vacuumed and caught by a chair leg — and intermittent faults from crushed cable are the worst class of fault there is, because they pass every test you run while you are standing there.
Part two: before and after
This is the part I actually get paid for, and the honest headline is that none of it is clever. There is no technique below that a careful person could not learn in an afternoon. The whole thing is patience plus the correct parts, which is why the toolkit further down this page is genuinely most of the answer.
Two of these are composites I made at the time, on my phone, on the job. The rest are pairs of my own frames of the same rack.
Same cabinet, same cable, same number of connections. Nothing was replaced — it was pulled out, combed, routed and put back. That is worth saying because the assumption is usually that a tidy rack is a rebuilt rack. Most of the time it is the same rack, re-dressed.
A full-height rack, before and after. The thing to look at is not the front — it is where the bundle turns. Every horizontal run enters the vertical path at a supported point, so the weight of the bundle is carried by the rack and not by the connectors.
Before
After
The same rack. The horizontal managers were already there in the first frame — you can see them between the panels. All that changed is that every cord now enters one, and every cord is the length of the journey it makes.
Before
After
My favorite of these, because the before frame is not even a mess of many cables — it is a mess of a few dozen. Volume is not what makes a rack unworkable. Unsupported cable is.
Before
After
The one I would show somebody who thinks this is about looks. Every port in the second frame can be traced by eye in about a second. In the first frame you would have to pull on a cable to find out where it goes, and pulling on a cable in a live rack is how you make a second outage while fixing the first.
Part three: the discipline
Here is everything I actually do, in the order I do it.
Plan on paper before you touch a cable
Decide, before anything is terminated, which panel serves which area, which switch each panel patches into, and where the uplinks live. Then decide where the bundle physically travels — down which side, through which manager, supported at which points. Ten minutes of that removes about ninety percent of the improvisation, and improvisation is where mess comes from.
The rule I hold to hardest: the patch panel and the switch it serves live next to each other. If a panel is patched into a switch four rack units away, every cord in it is four rack units of slack, and you have designed the mess in before you started.
Panels lettered rather than named, with a horizontal manager between each pair. The lettering is the important bit — a scheme that describes position rather than purpose survives every change of purpose that follows.
Service loops: leave slack, but leave it somewhere
A cable with no slack cannot be moved, re-terminated, or have a bad end cut off. A cable with unmanaged slack is the mess in part one. The answer is a service loop: a deliberate, contained amount of extra cable, coiled at a known place, secured, and consistent across the whole bundle.
Put the loop where the work happens — behind the panel, not halfway down the run — and make every loop in the rack the same size. Consistent loops read as intentional and stack neatly. Random loops read as slack, which is what they are.
One thing to be careful about, and it is the single most common way to damage a cable while trying to be tidy: every cable has a minimum bend radius, and it is printed by the manufacturer. Coiling tight enough to look neat can put a permanent kink in a run that will never fail outright and will never quite perform either. If a loop looks impressively small, it probably is too small.
Hook-and-loop, not zip ties. Every time, no exceptions.
This is the least negotiable opinion I have about wiring, and there are two reasons.
The first is that a zip tie cannot be undone. To move one cable you cut the tie, which frees eleven others, and now you are re-dressing the bundle. In practice people do not cut the tie — they force the cable through it, which brings me to the second reason.
A zip tie can be over-tightened, and hook-and-loop physically cannot. A nylon tie pulled hard deforms the jacket underneath it, changes the geometry of the twisted pairs inside, and creates exactly the kind of marginal, intermittent, passes-when-you-test-it fault that eats days. Hook-and-loop has no ratchet. It cannot crush what it holds. There is no version of this argument where the zip tie wins in a rack you will ever open again.
I use zip ties for exactly one thing: a permanent bundle in a place nobody will ever change, outdoors or in a tray. Never on a patch field.
Bundles dressed to the rails and supported at intervals, so the rack carries the weight. A bundle hanging from its own connectors is putting load on the one part of the whole system that was designed to carry none.
Labeling: the philosophy, without a real label in sight
I am describing this rather than showing it, for the reason at the top of the page. The principles do not need a photograph.
Label the position, not the purpose. A port labeled with a room and a jack number is true forever. A port labeled with the name of the team that sat there is wrong the first time somebody moves desks, and a wrong label is worse than no label, because a wrong label gets trusted.
Label both ends, identically, at the same time. A label on one end is half a system, and half a system is a system that gets abandoned.
Use the same scheme everywhere, including the places nobody sees. The value of a labeling scheme is entirely in its consistency. One improvised exception and people stop believing any of it.
Print it. Handwriting fades, smudges and disagrees with itself between the person who wrote the first fifty and the person who wrote the next fifty. A printed label is legible in two years, which is precisely when it matters.
And write the scheme down somewhere that is not the rack. A labeling scheme that only exists on the equipment dies with the equipment.
Patch panel hygiene
A few rules that between them do most of the work on the panel face itself. Patch every cord through a manager rather than across the face of a panel — a cord lying over ports means you cannot see link lights, and link lights are the fastest diagnostic in the building. Keep the pattern regular, so a break in the pattern is visible from across the room. Use the shortest cord that reaches, which is nearly always shorter than the one you reached for. And when you decommission something, pull the cord out — dead cable left in place is how a rack silently fills up with cable that means nothing.
Power gets the same treatment, and usually does not get it
Two feeds, marked so the roles are obvious, with the cords color-separated by feed. In a production data center this is what dual power actually looks like in practice — and the moment somebody plugs both supplies of one server into the same strip, the redundancy you paid for stops existing without telling anyone.
Route power on the opposite side of the rack from data where you can, keep it out of the same bundles, and mark the two feeds distinctly enough that a tired person at the end of a long night cannot get them the wrong way round.
Why it is worth the hours
Airflow
Equipment moves air front to back along a path. A curtain of cable across the back of a cabinet is an obstruction in that path, and an obstructed cabinet runs warmer, which makes fans work harder, which is both noise and wear. This is the same argument I make about a computer case on the PC cable management page, and it is the same physics at a different scale.
Troubleshooting time
This is the one that pays for the work. In a dressed rack you trace a path visually. In a nest you trace it by pulling, and pulling on cable in a live rack creates faults. The time difference is not marginal — it is the difference between a diagnosis and an investigation.
Ports you can trace at three in the morning
Everything above assumes a calm person with time. The actual test of a rack is somebody who has been woken up, who did not build it, who is under pressure and who has one chance to touch the right port. That is who you are wiring for. Not the photograph.
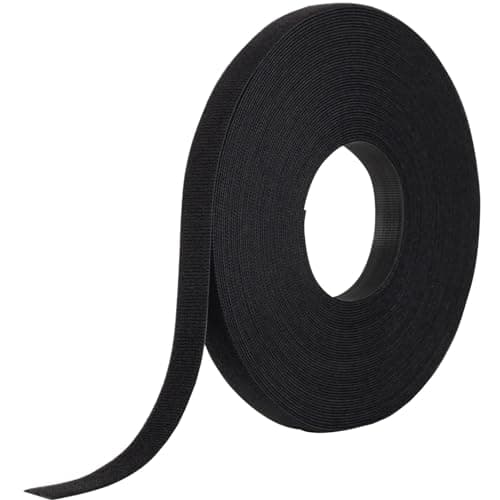
Buy the roll, not the pack. Cut every strap to the bundle in front of you and the rack stops being a place where somebody has to find scissors and a zip tie at 3am.
The same fastener with the cutting already done. A hundred of them is about the right number for a rack build plus the six months of small changes that follow it.
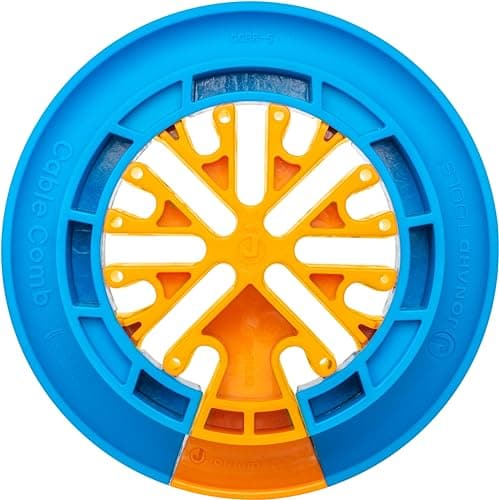
The tool that turns a handful of cable into a flat ribbon before you terminate it. This is the difference between a rack that looks combed and a rack that looks poured.
The unglamorous part that decides whether cable hangs off the panel or lands on something. Offset bars give the bundle somewhere to sit behind the rails instead of in front of the ports.
One foot is the correct length between a patch panel and the switch directly under it, and five colors is how you make a purpose visible without reading a single label.
Twenty-eight gauge is roughly half the diameter of a standard patch cord, and across forty-eight ports that difference is the whole reason the bundle fits behind the manager.
A handheld industrial labeller with the cable and patch-panel formats already in it. The reason to own one is not neatness — it is that a printed label is still legible in two years and a Sharpie scrawl is not.
The self-laminating trick is the important part: you print on the white block, wrap it round the cable, and the clear tail seals over the print so it cannot rub off.
The reason a run above the ceiling stays a run instead of becoming a hammock. A J-hook carries the bundle in a wide cradle, which is exactly what a zip tie strangling it to a pipe does not.
Five numbered remotes is the feature that matters. You cap five outlets, walk to the rack once, and identify five runs — instead of walking the building five times.
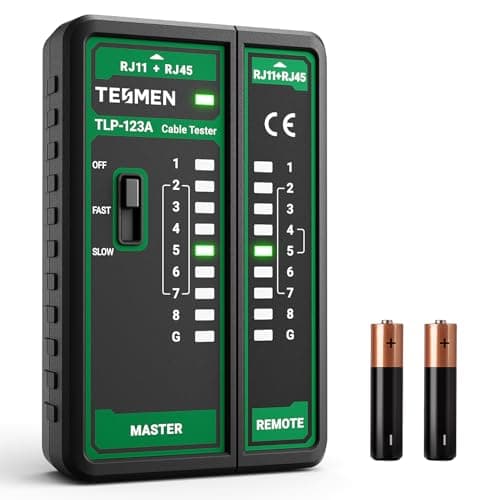
Thirteen dollars to find out whether you crimped it right. That is the entire job, it does it, and there is no honest reason to spend more if that is all you need.
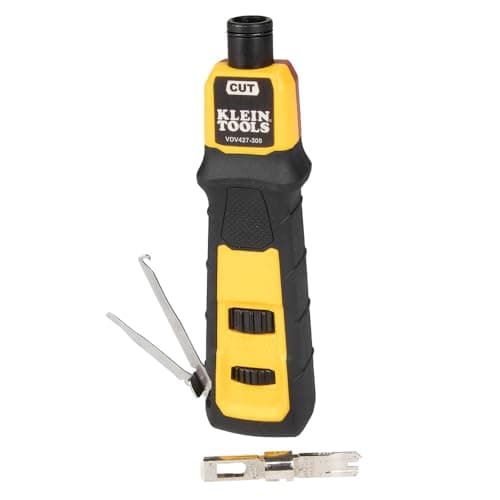
Adjustable impact force and a reversible 66/110 blade, which between them cover every keystone, patch panel and old telephone block you are likely to meet in a real building.
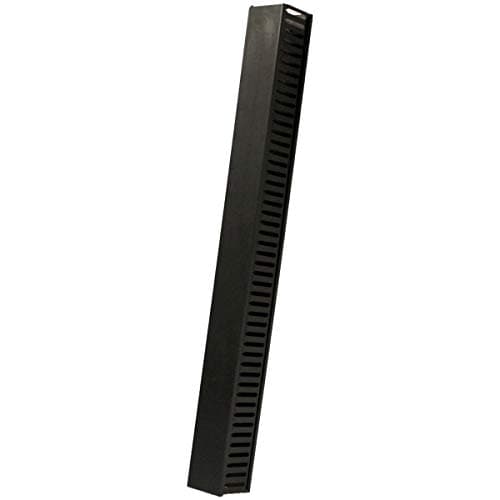
A genuinely good part, and the wrong thing to buy for a home rack. Two hundred dollars of vertical duct in a twelve-U cabinet is enterprise habit applied where it does not pay.
#ad · Live prices from the Amazon Creators API, as of October 19, 2026. Where we have no verified live price we show none — a gap beats a number that has rotted.
In detail
The picks, in full
01
Best overall
ONE-WRAP Tape, 3/4 in x 25 yd, double-sided roll
3/4 in wide25 yd rollDouble-sided self-grippingCut to length
8.8/10
Buy the roll, not the pack. Cut every strap to the bundle in front of you and the rack stops being a place where somebody has to find scissors and a zip tie at 3am.
Reusability
10
Value per use
9
Speed on the job
7
Rack tidiness
9
What's good
+Twenty-five yards is a genuinely large amount of strap — one roll dresses a full rack and then some
+Cutting to length means a two-cable bundle gets a two-cable strap rather than eight inches of tail
+Reusable by design, which is the entire argument against zip ties in a rack you will reopen
What's not
−You have to cut it, so it is slower than grabbing a pre-cut strap out of a bag
−Loose hook-and-loop collects dust and lint in a way a nylon tie does not
−Nothing about it is cheap per foot compared with a bag of zip ties
Skip it if…
…you are dressing one desk and will never touch it again. A pack of pre-cut straps is less faff and you will not use twenty-five yards.
Price as of October 19, 2026. Prices move — Amazon's is the one that counts.
#ad · we may earn a commission from this link to ONE-WRAP Tape, 3/4 in x 25 yd, double-sided roll
02
Best pre-cut
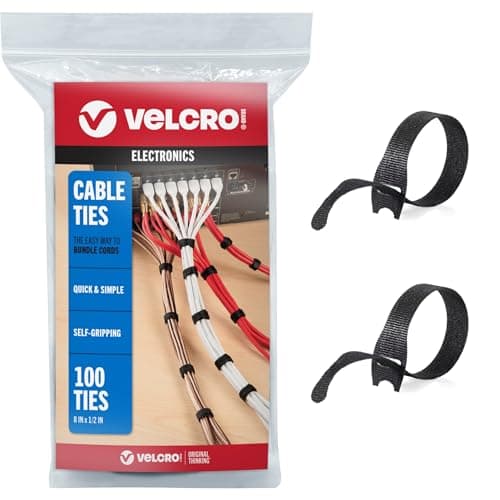
ONE-WRAP Cable Ties, 8 in x 1/2 in (100-pack)
8 in x 1/2 in100 per packSlotted headReusable
8.8/10
The same fastener with the cutting already done. A hundred of them is about the right number for a rack build plus the six months of small changes that follow it.
Reusability
10
Value per use
7
Speed on the job
10
Rack tidiness
8
What's good
+The slotted head means the strap stays with the bundle instead of ending up on the floor
+Eight inches wraps a fair-sized bundle and still closes on a single cable
+Fast — this is what you want in your pocket while you are actually dressing a rack
What's not
−One length for every job, so small bundles carry a long tail
−Works out more expensive per strap than cutting a roll
−Half-inch is wide for tying off a single patch cord
Skip it if…
…you are dressing large trunks. Buy the roll and cut, or you will burn three straps where one long one would have done.
The tool that turns a handful of cable into a flat ribbon before you terminate it. This is the difference between a rack that looks combed and a rack that looks poured.
Result quality
9
Speed on the job
9
Value
5
Durability
9
What's good
+Combing a bundle before termination is what produces the parallel look in every rack photo you have admired
+It also finds crossed pairs and tangles while they are still fixable
+A hand tool with nothing to break, wear out or charge
What's not
−Forty-five dollars for a piece of shaped plastic and metal is a lot to justify on one rack
−It does nothing you cannot do slowly with your fingers
−Only earns its price if you are dressing a lot of cable
Skip it if…
…this is a one-off home rack with twenty-four ports in it. Comb it by hand and put the money into patch cords.
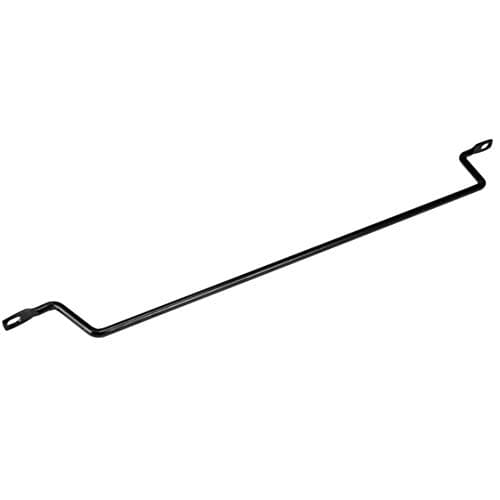
Lacing Bar with 2 in Offset, 19 in rack (CMLB102, 10-pack)
2 in offset19 in rack10 per packSteel
7.8/10
The unglamorous part that decides whether cable hangs off the panel or lands on something. Offset bars give the bundle somewhere to sit behind the rails instead of in front of the ports.
Result quality
9
Build quality
9
Value
6
Fit range
7
What's good
+Offset is the point — the bar sits behind the mounting plane, so cable is supported without covering ports
+Ten of them is enough to bar out a full rack rather than doing three tidy U and giving up
+Steel, so it holds a real bundle without sagging
What's not
−Seventy dollars is real money for what is, physically, ten pieces of bent steel
−Two-inch offset does not suit every rack depth; four-inch exists for a reason
−You have to plan where they go before you terminate, not after
Skip it if…
…your rack has proper vertical and horizontal managers already. Lacing bars solve a support problem that finger duct has usually solved for you.
Price as of October 19, 2026. Prices move — Amazon's is the one that counts.
#ad · we may earn a commission from this link to Lacing Bar with 2 in Offset, 19 in rack (CMLB102, 10-pack)
05
Best short patch cables
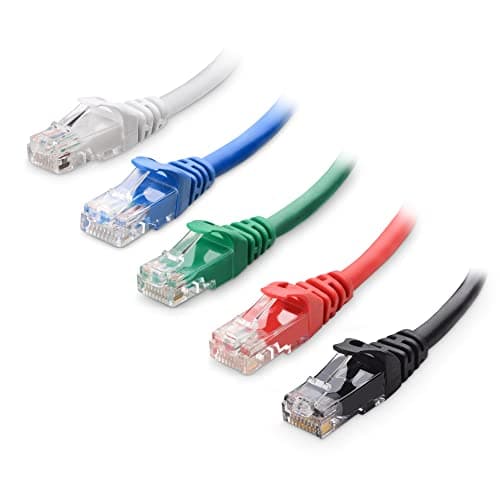
Snagless Cat 6 Patch Cable, 1 ft, 5-color combo
Cat 61 ft5-color comboSnagless boot10 Gbps rated
8.5/10
One foot is the correct length between a patch panel and the switch directly under it, and five colors is how you make a purpose visible without reading a single label.
Fit for purpose
9
Build quality
8
Value
9
Color scheme use
8
What's good
+A one-foot cord cannot loop, sag or join the nest — the length itself enforces tidiness
+Five colors gives you a color scheme rather than a color
+Snagless boots stop the tab shearing off the first time you pull the bundle
What's not
−One foot is unforgiving; if the switch is not directly under the panel it will not reach
−A combo pack means you get colors you did not want in the quantities you did not choose
−Not enough of any one color to run a scheme across a large panel
Skip it if…
…your switch and patch panel are separated by managers or a gap. Measure first — a cable that is two inches short is a cable you throw away.
Price as of October 19, 2026. Prices move — Amazon's is the one that counts.
#ad · we may earn a commission from this link to Snagless Cat 6 Patch Cable, 1 ft, 5-color combo
06
Best for a dense panel
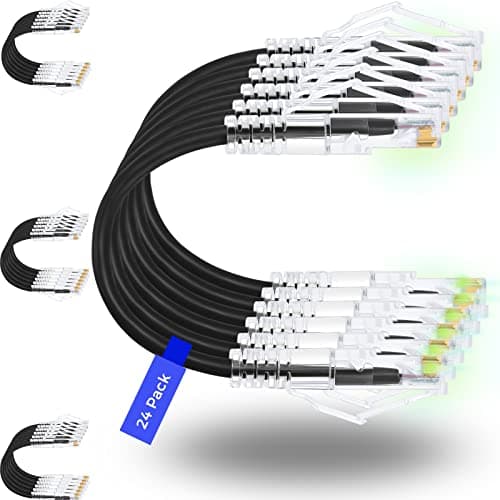
Slim Cat 6/6a Patch Cable, 2 ft, 28 AWG (24-pack)
Cat 6/6a2 ft28 AWG slim24 per pack10 Gbps supportSnagless
8.3/10
Twenty-eight gauge is roughly half the diameter of a standard patch cord, and across forty-eight ports that difference is the whole reason the bundle fits behind the manager.
Fit for purpose
9
Space saving
10
Value
8
Versatility
6
What's good
+Slim cord in a 48-port field is the single biggest volume saving available to you
+Twenty-four of the same length and color, which is what a scheme actually needs
+Two feet is forgiving where one foot is not
What's not
−Thin conductors mean a shorter usable distance than standard cord — these are patch-field cables, not runs
−28 AWG in a dense bundle carries less current for Power over Ethernet than heavier cord
−One color per pack, so a scheme means buying several packs
Skip it if…
…you are running Power over Ethernet hard across a full switch. Thin conductors and PoE heat are a real interaction, and the standard-gauge cord is the safe answer.
Price as of October 19, 2026. Prices move — Amazon's is the one that counts.
#ad · we may earn a commission from this link to Slim Cat 6/6a Patch Cable, 2 ft, 28 AWG (24-pack)
07
Best label maker
PT-E110 Industrial Handheld Label Printer Kit
Handheld industrial labellerKitBrother P-touchFor wire and cable
8.0/10
A handheld industrial labeller with the cable and patch-panel formats already in it. The reason to own one is not neatness — it is that a printed label is still legible in two years and a Sharpie scrawl is not.
Fit for purpose
9
Durability of result
9
Value
6
Ease of use
8
What's good
+Purpose-built for cable and panel work rather than a home labeller pressed into service
+Handheld and battery powered, so it goes up the ladder with you
+Printed labels survive handling, heat and time in a way handwriting does not
What's not
−Sixty dollars plus consumables for a machine that does one job
−Tape cassettes are the ongoing cost and they are not cheap
−Overkill unless you are labeling more than a couple of dozen things
Skip it if…
…you have twelve cables to mark. Buy the write-on labels below and put the difference into cable.
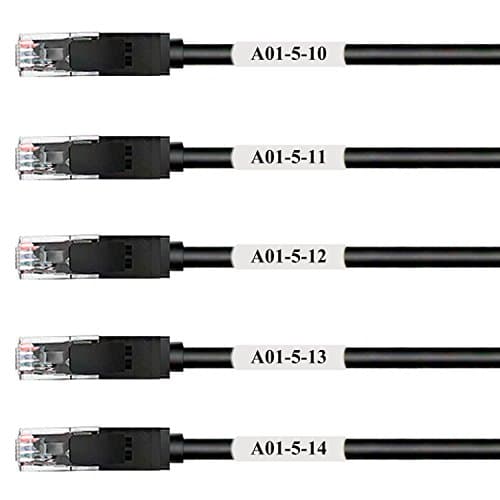
25 sheets800 labelsSelf-laminating wrap-aroundLaser printer only
8.0/10
The self-laminating trick is the important part: you print on the white block, wrap it round the cable, and the clear tail seals over the print so it cannot rub off.
Fit for purpose
8
Durability of result
9
Value
9
Ease of use
6
What's good
+The clear over-wrap is what makes a cable label last — plain paper tape does not
+Eight hundred labels for the price of a couple of tape cassettes
+You can lay out a whole labeling scheme in a document before you go near the rack
What's not
−Laser only — an inkjet will smear and the sheet warns you about it
−You have to plan the whole batch in advance rather than printing one at the rack
−A sheet of unused labels is wasted once you have cut into it
Skip it if…
…you make labeling changes constantly. Printing a sheet at a time to add two labels is worse than owning a handheld.
Price as of October 19, 2026. Prices move — Amazon's is the one that counts.
#ad · we may earn a commission from this link to Self-Laminating Wrap-Around Cable Labels, laser sheets (25 sheets / 800 labels)
09
Best cable support
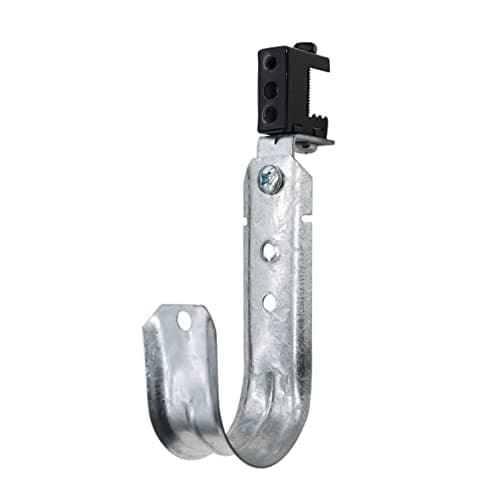
Cable Support J-Hook with Beam Clamp, 2 in (10-pack)
2 in J-hookBeam clamp mountMetal10 per pack
7.5/10
The reason a run above the ceiling stays a run instead of becoming a hammock. A J-hook carries the bundle in a wide cradle, which is exactly what a zip tie strangling it to a pipe does not.
Fit for purpose
9
Build quality
7
Value
8
Mounting range
6
What's good
+A wide radius cradle supports cable without pinching it, which is the whole point of the shape
+The beam clamp means no drilling — it grips structure that is already there
+Ten hooks covers a decent run at sensible spacing
What's not
−Two inches fills fast; a growing run needs bigger hooks or more of them
−The clamp only fits structure in its jaw range, so it is not a universal mount
−Ten is not many once you are spacing them properly along a long run
Skip it if…
…you are hanging cable from anything other than suitable structure. Do not clamp to conduit, sprinkler pipe or ductwork — that is somebody else's system and in most places it is against code.
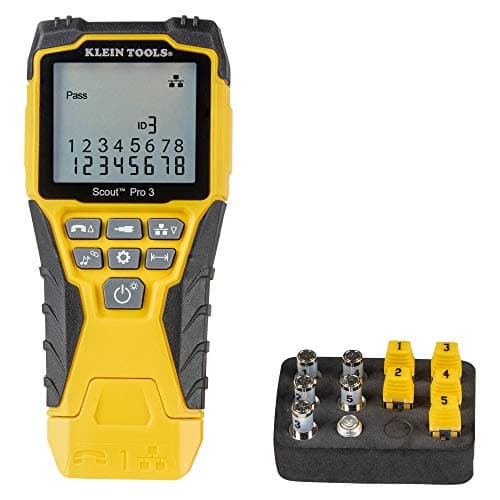
Five numbered remotes is the feature that matters. You cap five outlets, walk to the rack once, and identify five runs — instead of walking the building five times.
Fit for purpose
9
Time saved
10
Build quality
9
Value
6
What's good
+Numbered remotes turn cable identification from a two-person job into a one-person job
+Covers data, coax and phone, which is what an old building actually contains
+Klein service and availability is genuinely easy compared with the specialist test brands
What's not
−A hundred dollars is a lot next to a twelve-dollar continuity tester
−It is a wiremap and locate tool, not a certifier — it does not tell you a run passes Cat 6
−More tool than most people will ever need at home
Skip it if…
…you need to certify a permanent link to a category standard. That is a different and far more expensive class of instrument, and this one does not claim to be it.
Price as of October 19, 2026. Prices move — Amazon's is the one that counts.
#ad · we may earn a commission from this link to VDV501-851 Cable Tester Kit with Scout Pro 3, 5 locator remotes
11
Best budget
TLP-123A Network Cable Tester, RJ11 / RJ45
RJ11 / RJ45Cat5 / 5e / 6 / 6a / 7UTP and STPContinuity test
7.0/10
Thirteen dollars to find out whether you crimped it right. That is the entire job, it does it, and there is no honest reason to spend more if that is all you need.
Fit for purpose
7
Time saved
5
Build quality
6
Value
10
What's good
+Catches the two mistakes that actually happen: a reversed pair and a conductor that never seated
+Cheap enough to keep in the bag and not care about
+Needs no training whatsoever — the lights walk in order or they do not
What's not
−Continuity only. It will not locate a run, tone a cable or measure anything
−You have to have both ends of the cable in front of you
−Tells you the pairs are connected, not that the link will carry 10 Gbps
Skip it if…
…you need to find which of forty-eight unlabelled ports goes to the office at the far end of the building. That is the job the Scout Pro kit exists for.
Impact punchdown66/110 blade includedAdjustable forceIncludes pick and spudger
8.5/10
Adjustable impact force and a reversible 66/110 blade, which between them cover every keystone, patch panel and old telephone block you are likely to meet in a real building.
Fit for purpose
9
Build quality
9
Versatility
9
Value
7
What's good
+Impact seats and trims in one motion — the seating is the part a non-impact tool gets wrong
+The 66 side matters more than people expect; old buildings are full of 66 blocks
+The included pick is what you use to get a mis-punched conductor back out
What's not
−Forty dollars when a fifteen-dollar impact tool exists and works
−The adjustable force is a setting most people set once and never touch
−Blades are a wear item and are sold separately
Skip it if…
…every jack you own is a tool-less keystone. Check the jacks before you buy a tool for jacks that do not need one.
1-Channel Steel Vertical Duct Cable Manager, 68 in
68 in1 channelSteel ductVertical
5.5/10
A genuinely good part, and the wrong thing to buy for a home rack. Two hundred dollars of vertical duct in a twelve-U cabinet is enterprise habit applied where it does not pay.
Fit for a home rack
2
Build quality
9
Value at home
2
Fit for a full rack
9
What's good
+In a full-height two-post rack carrying hundreds of cords, this class of part is genuinely correct
+Steel duct with a cover keeps a large trunk contained and reachable
+Sixty-eight inches spans a real rack rather than a section of one
What's not
−Two hundred dollars, which for most home racks is more than the rack
−Sixty-eight inches does not fit a wall-mount or a short cabinet at all
−Solves a cable volume problem that a twenty-four port home panel does not have
Skip it if…
…your rack is a wall-mount, a twelve-U cabinet or anything you can reach around. This is the one on the list I would tell you to skip — a fifteen-dollar 1U finger duct between the panel and the switch does the job you actually have.
Price as of October 19, 2026. Prices move — Amazon's is the one that counts.
#ad · we may earn a commission from this link to 1-Channel Steel Vertical Duct Cable Manager, 68 in
The toolkit, and what to buy first
Everything above is method, and method is free. What follows is the part that costs money, in the order I would spend it.
One honest disclosure before the list. The discipline on this page is mine — the specific listings below are current, live equivalents chosen by category, and I am not going to pretend a particular SKU is the one in my bag. That is why nothing here carries the "I run this one" stamp you will see elsewhere on this site. What I can tell you is which category does the work and which does not.
Buy in this order
Hook-and-loop first, because it is cheap and it is the habit change. Buy a roll if you are dressing a rack, pre-cut straps if you are keeping one tidy, and stop buying zip ties for anything you will reopen.
Patch cords in the right lengths second, because wrong-length cable is the root cause of more mess than laziness. One foot between a panel and the switch under it, two feet if there is a manager in between. Slim 28 AWG cord is worth it across a dense panel purely on volume, with one caveat: if you are running Power over Ethernet hard across a full switch, thin conductors and PoE heat interact, and standard gauge is the safe answer.
A punch-down tool third, if you are terminating anything at all. Check your jacks first — plenty of modern keystones are tool-less and need nothing.
Labeling fourth. A handheld industrial printer if you will label more than a couple of dozen things; self-laminating laser sheets if you will not. Either way the self-laminating principle matters: print on the white block, wrap it, and the clear tail seals over the print so it cannot rub off.
Testing fifth. A thirteen-dollar continuity tester catches the two mistakes that actually happen — a reversed pair and a conductor that never seated. Step up to a kit with numbered locator remotes only when your problem has become "which of these forty-eight ports goes where", because that is a different problem and it is a walking-around problem.
Rack hardware last, and less of it than you think. Lacing bars and J-hooks solve real support problems. Two hundred dollars of full-height vertical duct in a home cabinet solves a problem you do not have — that is the skip on this list, and it is the cleanest example I know of an enterprise habit that does not survive the trip home.
The one thing money cannot buy you
None of this works without the boring part: doing the tidy-up inside the same change window as the work, every time, so it is never a separate task competing with a separate priority. Every rack in part one belonged to somebody who fully intended to come back.
How these were picked
I haven't handled these. Here's what I did instead.
Everyone in this category says they tested twenty of these. I haven't tested any, and I say so. What I do instead: read the manufacturer's manual and published specification, compile the numbers that decide the purchase, do the arithmetic in the open, check the live price, and name one product to skip. The scores above are judgments from that research against a published rubric — they are not measurements I took, because I do not have a lab and I am not going to pretend otherwise.
Questions
Frequently asked
Velcro or zip ties for network cable?+
Hook-and-loop, in any rack you will open again. A zip tie cannot be undone without cutting it, which frees every other cable in the bundle, and it can be over-tightened — deforming the jacket and the pair geometry inside, which produces intermittent faults that pass every test you run while you are standing there. Hook-and-loop has no ratchet and physically cannot crush what it holds. Zip ties are fine for a permanent bundle nobody will ever change.
What length patch cables should I buy?+
The length of the journey. One foot between a patch panel and a switch directly under it, two feet if a cable manager sits between them. The single most common cause of a messy rack is a bulk box of one long length — every short connection then becomes several feet of slack that has to go somewhere, and where it goes is the loop pile.
How do you label a network rack properly?+
Label the position, not the purpose — a room and jack number stays true, a team name is wrong the moment somebody moves desks. Label both ends identically and at the same time. Use one scheme everywhere including the places nobody looks, because the value is entirely in the consistency. Print rather than write, so it is still legible in two years. And keep the scheme written down somewhere other than the rack.
What is a service loop and how big should it be?+
A deliberate, contained amount of extra cable left at a known point so a run can be moved or re-terminated later. Put it where the work happens — behind the panel, not halfway along the run — and make every loop in the rack the same size, so consistency makes it read as intentional. Do not coil it tighter than the cable's stated minimum bend radius to make it look neat; that puts a permanent kink in a run that will never quite fail and never quite perform.
Does cable management actually affect performance?+
Indirectly, and in two real ways. A curtain of cable across the back of a cabinet obstructs the front-to-back airflow path, so equipment runs warmer and fans work harder. And a cable crushed under an over-tightened tie or bent past its minimum radius can produce marginal, intermittent faults. What tidy wiring mostly buys you is not throughput — it is troubleshooting time, and that is the bigger number.
Is any of this worth doing on a home network?+
The method, yes, all of it — right-length cords, hook-and-loop, service loops, labeling both ends. The hardware, mostly no. Full-height vertical duct, deep lacing bar sets and certification-grade testers solve volume and scale problems a twenty-four port home panel does not have. A fifteen-dollar 1U finger duct between the panel and the switch does almost all of the work at home.
Why are there no equipment labels visible in these photographs?+
Because they were cropped out, or the photograph was not published. Every frame here was reviewed at full resolution; where a readable hostname, asset tag or circuit ID sat at an edge the image was cropped, and where it could not be cropped away the frame was rejected. Nothing is blurred. No client, employer, facility or location is named anywhere, and the labeling section deliberately describes a scheme rather than showing one.
We do not run a testing lab and we do not pretend to. Where a measured number came from a manufacturer's published specification or someone else's lab, we name them and link them. Where we could not verify something, we say so on the page rather than quietly leaving it out. Read the full method.